Creating a new repository from scratch
– In Windows Explorer, create the folder to contain your repository folder.
– Right-click on this folder and select “Create Repository Here…”
– In the code project that you wish to put under version control, remove all files/folders not intended needed ege *.obj or the Release/Debug folders.
– Right-click the project folder and select Import which will bring up the following dialog. Specify the URL of the repository location you just created where you will want to import your project. Click OK.

Rolling back code changes
So far my use of TortoiseSVN / Subversion has been great for tracking every change made to a product. So far I have only needed to go back to a previous version temporarily. This time however, due to some undesirable things recently comitted, I want to roll back permanently the broken revision.
On looking at TortoiseSVN’s right-click menu, it would appear that there is no roll-back feature. There certainly is no menu item that expressly says “Roll back”. On further probing however, it is actually possible. One way is to use the (sometimes) complicated merge technique with TortoiseSVN. I much prefer the much simpler revert method.
This lets you undo changes from which were made in the selected revision. The changes are undone in your working copy only so this will not affect your repository. This will undo the changes made in that selected revision only.
To use:
– right click the folder and select TortoiseSNV -> Show log
– locate the revision to roll back – the most recent in my case
– right-click on that revision
– choose “revert changes from this revision” from the context menu
Renaming a TortoiseSVN repository folder
– Re-name the repository.
– Right-click on the repository folder and select “relocate” from the drop-down menu.
Importing projects into Subversion trunk paths:
Right-click the project folder and choose Import… making sure to include the trunk part of the repository:

This trunk version of the project is considered the most important, while any other potentially disruptive work is done in the branches section of the repository.
Backing up a respositories safely
At the command prompt run:
svnadmin hotcopy “MySourceFolderLocation” “MyDestinationFolderLocation”
Creating trunk/branch/tags folder structures within your repository
Right-click the repository folder and select Repo-browser. Once opened use the right-click “Create Folder…” menu option to create the folders in three separate commits
Importing data into repositories
Right-click the top-level folder. Choose “Tortoise-SVN -> Import…”. Enter the URL of the repository location, remembering to specify the subdirectory as part of the URL: eg http://mydomain.com/svn/trunk/MySubDir.
Checking out working copies of a project
Select a directory where you would like to place your working copy, right-click and select TortoiseSVN -> Checkout. I normally use fully recursive.
Branching
What if I want to continue the same project using a separate line of development? For example, with stuff that for the time being would be too disruptive or risky to the main line of development, but which could later be merged back into the main trunk when the new features are stable enough…
Right-click the project folder and select TortoiseSVN -> Branch/Tag:
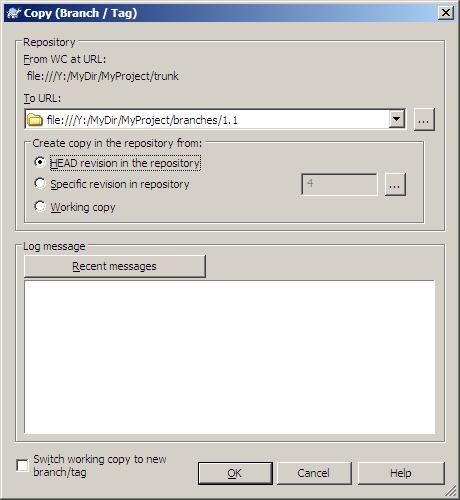
This will create the new branch 1.1. Supposing you have not yet adopted the standard trunk/branches/tags file structure as recommended by the SVN community, and all your files are currently located in the main project directory. Switching to a trunk directory as a means of keeping your most up-to-date stable release is also straightforward. Simply do a right-click -> branch/tag as before but this time time be sure to include “/trunk” after the main directory AND… be sure to set the checkbox “Switch working copy to new branch/tag”:
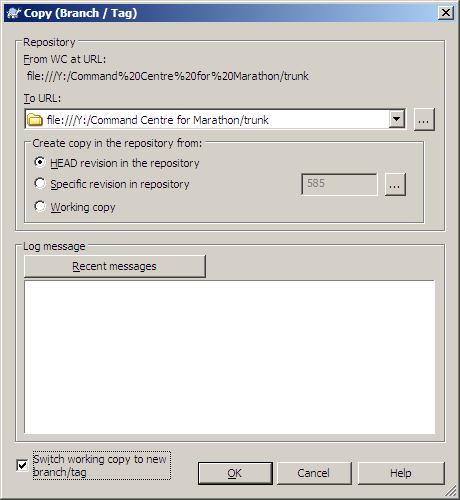
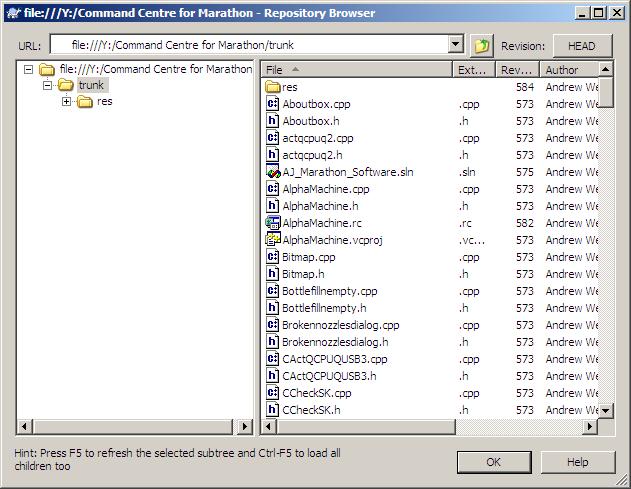
And then upon selecting the Repo-Browser for this folder you will see that your main release is now housed in the “trunk” folder (For branches and tag folders you will probably elect to leave this checkbox unset.
As with branching, select TortoiseSVN->Branch/Tag, and in my example I have typed “1.2” into the “To URL:” edit box as the latest release to be tagged. On clicking OK the folder “1.2” is automatically created in the repo browser and the tagged version created.
I found a bug, now what? How do I update my tagged version?
Suppose you have made a small improvement or bug fix to your latest version (1.2 in my case). The temptation may be to create a separate branch, do the changes, and then merge it back into the main trunk. A simpler way would be to first to check out a copy of your trunk to a local directory (if you’ve not already done so), do the fixes, and then commit the changes back in to the repository. Then simply tag the latest trunk as “1.2.1” like we did in “1.2” and we’ll now have this in our repository:

Merging changes made in branched/tagged versions back into the main trunk: