Some instructions and screenshots to help you get up and running using the Fast Light Toolkit (FLTK) within the NetBeans development environment in Linux. For configuring FLTK in Visual Studio environments please refer to this post.
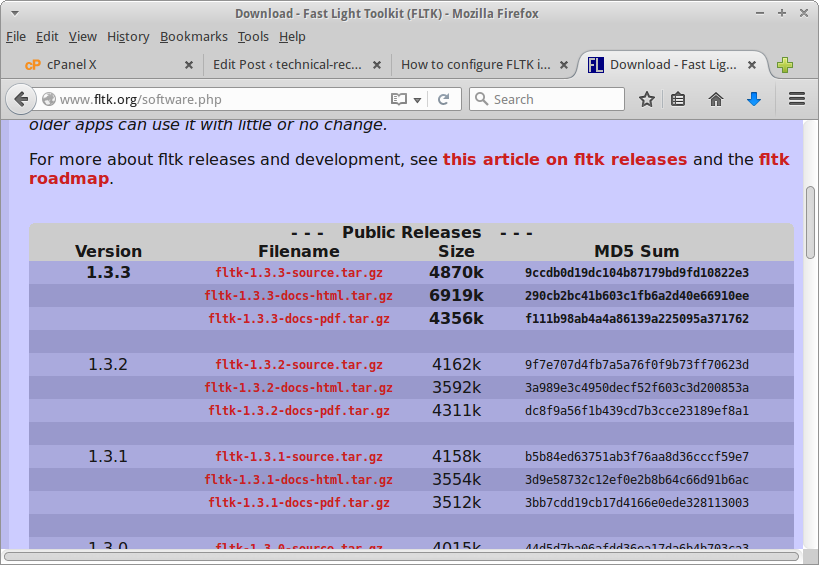
Go to the FLTK website and download the latest source:
http://www.fltk.org
Extract the tarball to your selected home directory using the following commands:
$ gunzip fltk-1.3.3-source.tar.gz
$ tar -xvf fltk-1.3.3-source.tar
Then navigate (cd) to the newly-created fltk directory and install:
$ ./configure
$ make
$ sudo make install
It is also necessary to download and install the necessary libraries. Run the following command:
$sudo apt-get install libx11-dev libxpm-dev x11proto-xext-dev libxext-dev g++
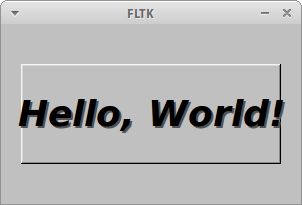
For this example, we use an example “Hello World!” test program to test the functionality of FLTK and its dependencies. Create a new C++ application in NetBeans, using the following code as your main.cpp:
#include <FL/Fl.H>
#include <FL/Fl_Window.H>
#include <FL/Fl_Box.H>

int main(int argc, char **argv)
{
  Fl_Window *window = new Fl_Window(300,180);
  Fl_Box *box = new Fl_Box(20,40,260,100,"Hello, World!");
  box->box(FL_UP_BOX);
  box->labelsize(36);
  box->labelfont(FL_BOLD+FL_ITALIC);
  box->labeltype(FL_SHADOW_LABEL);
  window->end();
  window->show(argc, argv);
  return Fl::run();
}
There are still a number of things you will need to do before your example test program will successfully compile and run, which are now described in the following sections:
Test FLTK with the test-config script
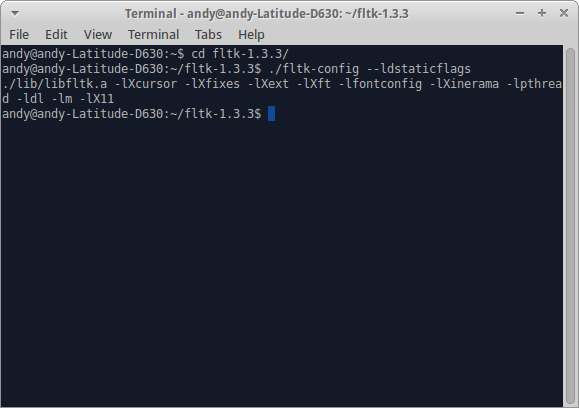
You will need to determine what dependencies will be needed to run your FLTK project. Run the fltk-config script that comes with the FTLK installation:
“–cxxflags”
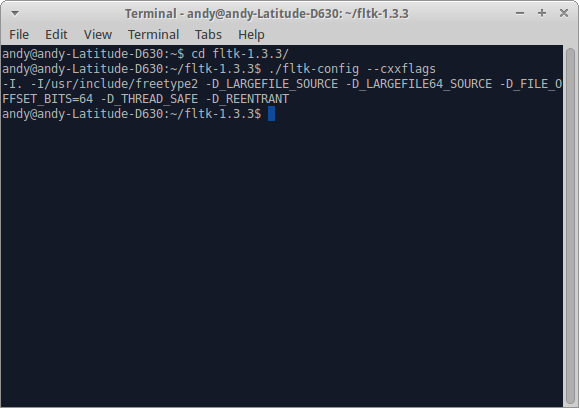
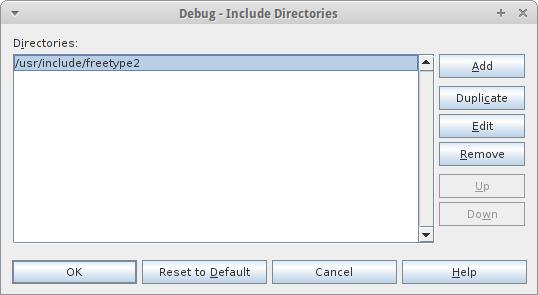
From the console output we can see that this project will require the dependency:
/usr/include/freetype2
“–ldflags”
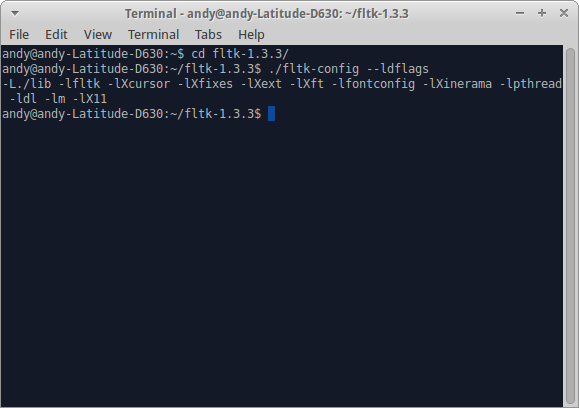
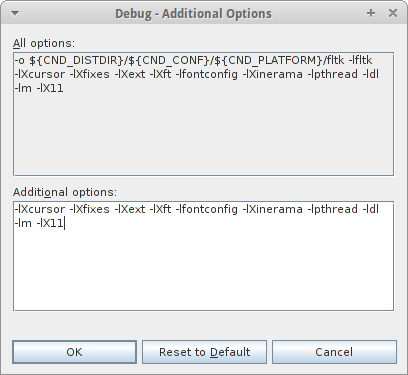
From the console output we can see that this project will need the following linker flags:
-lXcursor -lXfixes -lXext -lXft -lfontconfig -lXinerama -lpthread -ldl -lm -lX11
“–ldstaticflags”
Configure the Include directories
Right-click on your project and select Properties. Then select ‘C++ Compiler’
and then ‘Include Directories’. Add the directory(s) obtained from the “cxxflags” command run previously:
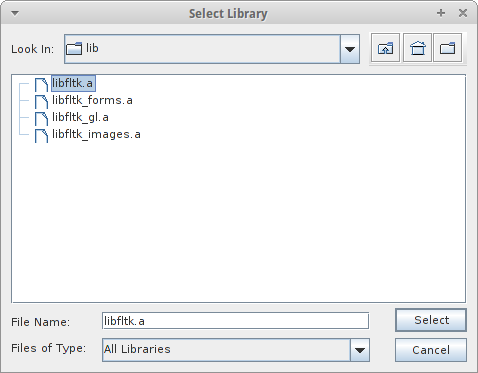
Configure the Linker
Right-click on your Project and select Properties. Then select “Linker” and then “Libraries”. Click “Add Library” and add “libfltk.a”. This can be found in the lib directory inside the fltk folder:
Configure Additional Options
Add the options obtained through running the “ldflags” option described previously. In my case it was:
-lXcursor -lXfixes -lXext -lXft -lfontconfig -lXinerama -lpthread -ldl -lm -lX11
Right-click on your project and select Properties. Then select “Linker” and “Additional Options” and copy in the linker flag options:
The project should then be ready to compile and run: