Creating the WCF web service in Visual Studio
In this post I am using the WCF Web Service as an example, see this post for an example using using asmx:
https://www.technical-recipes.com/2017/creating-and-consuming-a-web-service-in-c-net/
A useful C# Corner post:
http://www.c-sharpcorner.com/article/create-wcf-web-service-in-visual-studio-2015/
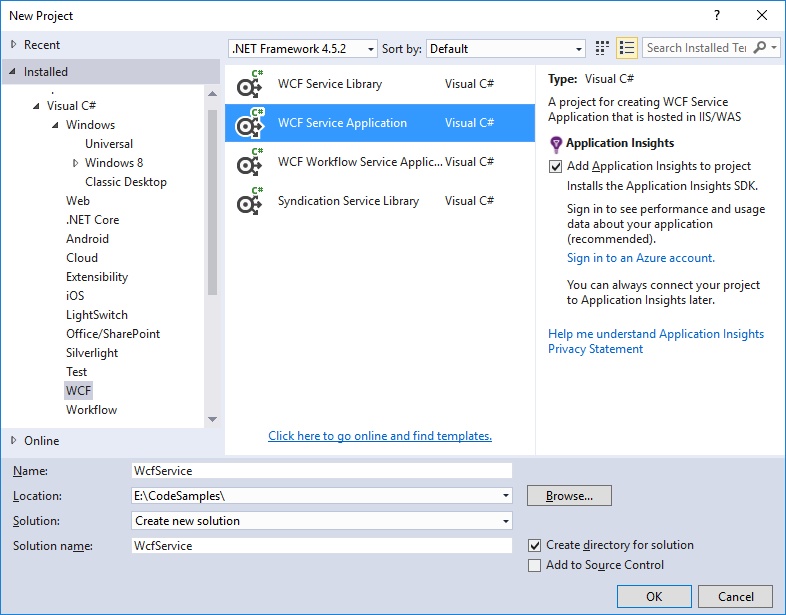
Create a new Visual Studio project
In Visual Studio select the WCF installed template and create a new WCF Service Application:
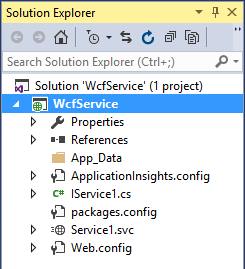
Observe that a number of files are automatically created: IService1.cs, Service1.cs and Web.config, amongst others.,
We will modify the content of these for the purpose of this example:
Update the code in IService.cs file, as highlighted below. Notice that is does not do much since I like to keep these recipes extremely simple, understanding the process is more important.
IService1.cs
using System.Runtime.Serialization;
using System.ServiceModel;
using System.ServiceModel.Web;

namespace WcfService
{
   // NOTE: You can use the "Rename" command on the "Refactor" menu to change the interface name "IService1" in both code and config file together.
   [ServiceContract]
   public interface IService1
   {
      [OperationContract]
      string GetData(int value);

      [OperationContract]
      CompositeType GetDataUsingDataContract(CompositeType composite);

      [OperationContract]
      [WebGet(UriTemplate = "/HelloWorld/")]
      string HelloWorld();
   }


   // Use a data contract as illustrated in the sample below to add composite types to service operations.
   [DataContract]
   public class CompositeType
   {
      [DataMember]
      public bool BoolValue { get; set; } = true;

      [DataMember]
      public string StringValue { get; set; } = "Hello ";
   }
}
Once the interface class is done do the concerete implementation in Service1.scv.cs:
Service1.scv.cs
using System;

namespace WcfService
{
   // NOTE: You can use the "Rename" command on the "Refactor" menu to change the class name "Service1" in code, svc and config file together.
   // NOTE: In order to launch WCF Test Client for testing this service, please select Service1.svc or Service1.svc.cs at the Solution Explorer and start debugging.
   public class Service1 : IService1
   {
      public string HelloWorld()
      {
         return "Hello world!";
      }

      public string GetData(int value)
      {
         return $"You entered: {value}";
      }

      public CompositeType GetDataUsingDataContract(CompositeType composite)
      {
         if (composite == null)
            throw new ArgumentNullException(nameof(composite));
         if (composite.BoolValue)
            composite.StringValue += "Suffix";
         return composite;
      }
   }
}
Edit the Web.Config file. Be sure to include the ‘endpointBehaviors’ and ‘add’ elements as shown:
Web.Config
<?xml version="1.0"?>

<configuration>

  <appSettings>
    <add key="aspnet:UseTaskFriendlySynchronizationContext" value="true" />
  </appSettings>
  <system.web>
    <compilation debug="true" targetFramework="4.5.2" />
    <httpRuntime targetFramework="4.5.2" />
    <httpModules>
      <add name="ApplicationInsightsWebTracking"
           type="Microsoft.ApplicationInsights.Web.ApplicationInsightsHttpModule, Microsoft.AI.Web" />
    </httpModules>
  </system.web>
  <system.serviceModel>
    <behaviors>
      <serviceBehaviors>
        <behavior>
          <!-- To avoid disclosing metadata information, set the values below to false before deployment -->
          <serviceMetadata httpGetEnabled="true" httpsGetEnabled="true" />
          <!-- To receive exception details in faults for debugging purposes, set the value below to true.  Set to false before deployment to avoid disclosing exception information -->
          <serviceDebug includeExceptionDetailInFaults="false" />
        </behavior>
      </serviceBehaviors>
      <endpointBehaviors>
        <behavior>
          <webHttp />
        </behavior>
      </endpointBehaviors>
    </behaviors>
    <protocolMapping>
      <add binding="webHttpBinding" scheme="http" />
      <add binding="basicHttpsBinding" scheme="https" />
    </protocolMapping>
    <serviceHostingEnvironment aspNetCompatibilityEnabled="true" multipleSiteBindingsEnabled="true" />
  </system.serviceModel>
  <system.webServer>
    <modules runAllManagedModulesForAllRequests="true">
      <remove name="ApplicationInsightsWebTracking" />
      <add name="ApplicationInsightsWebTracking"
           type="Microsoft.ApplicationInsights.Web.ApplicationInsightsHttpModule, Microsoft.AI.Web"
           preCondition="managedHandler" />
    </modules>
    <!--
        To browse web app root directory during debugging, set the value below to true.
        Set to false before deployment to avoid disclosing web app folder information.
      -->
    <directoryBrowse enabled="true" />
    <validation validateIntegratedModeConfiguration="false" />
  </system.webServer>

</configuration>
Re-build your project.
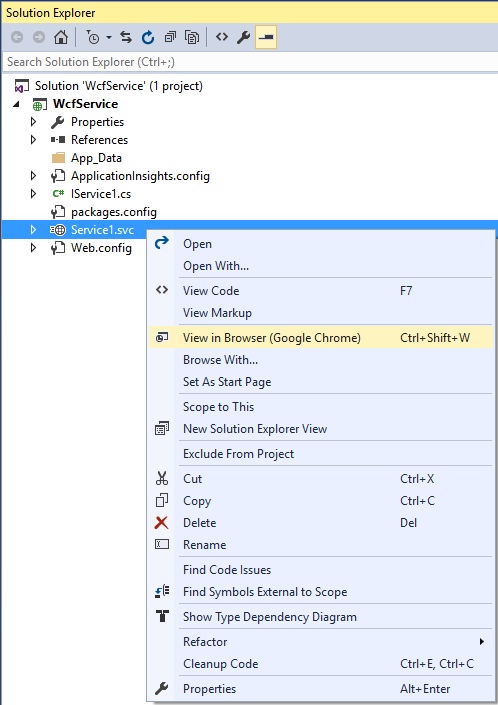
To verify the service, right click on Service1.svc and select to view in a browser:
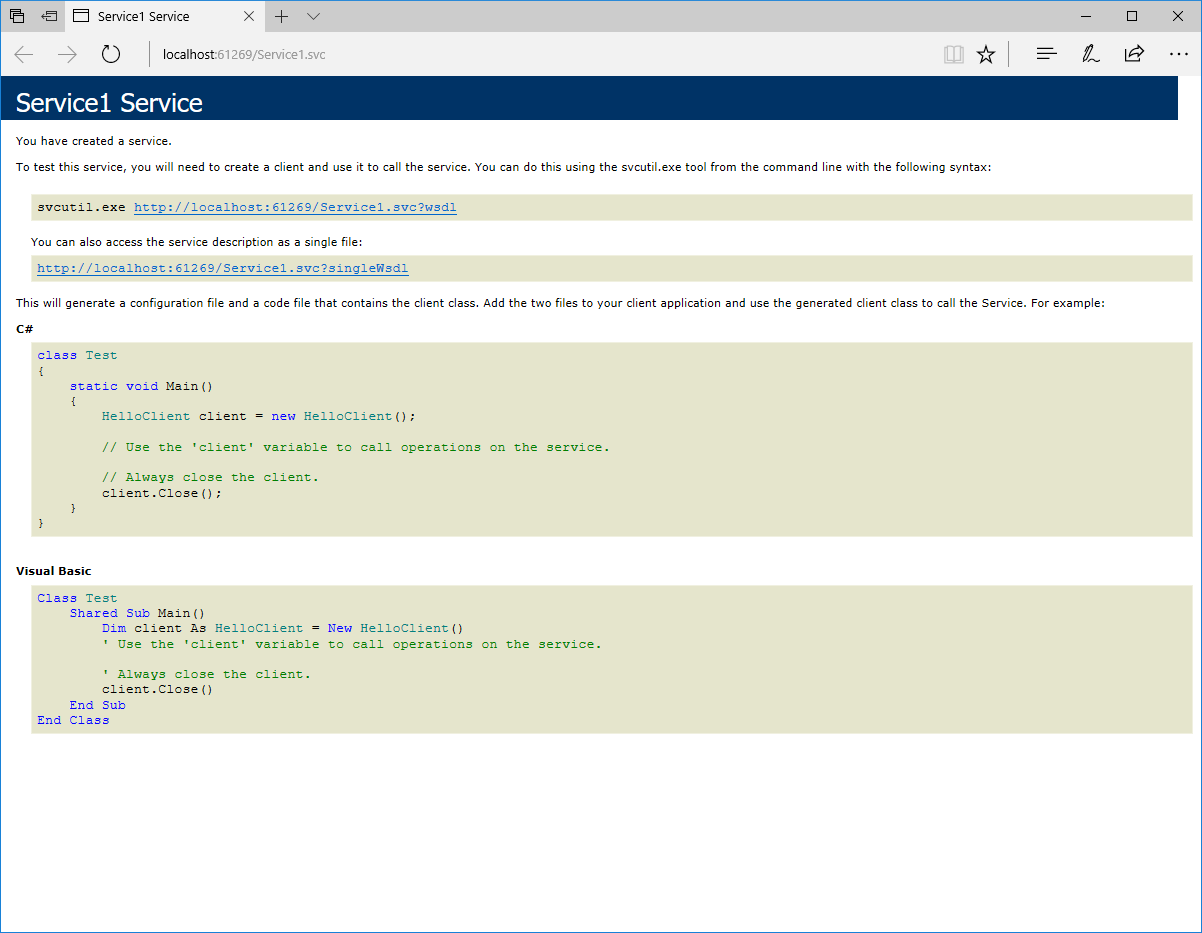
And see that the service created is as shown:
Consuming the WCF Web Service
Create a new Console Application in your solution

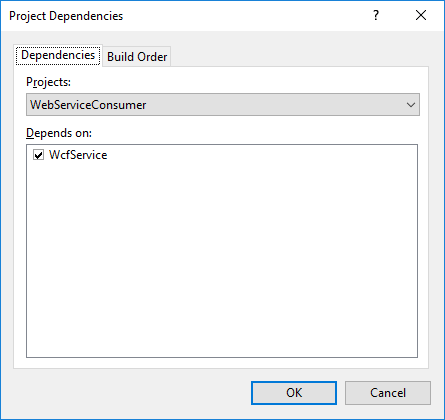
Set your project dependencies:
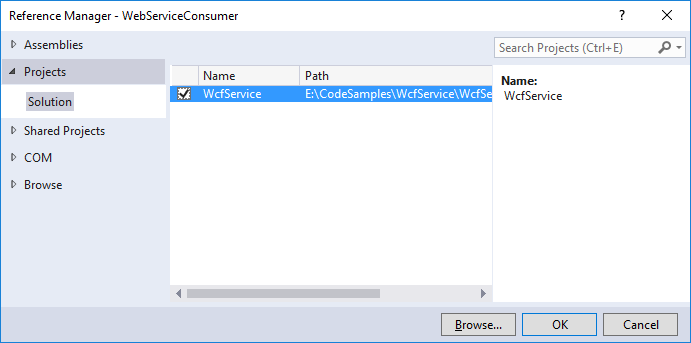
Set the reference to be used by the console application:
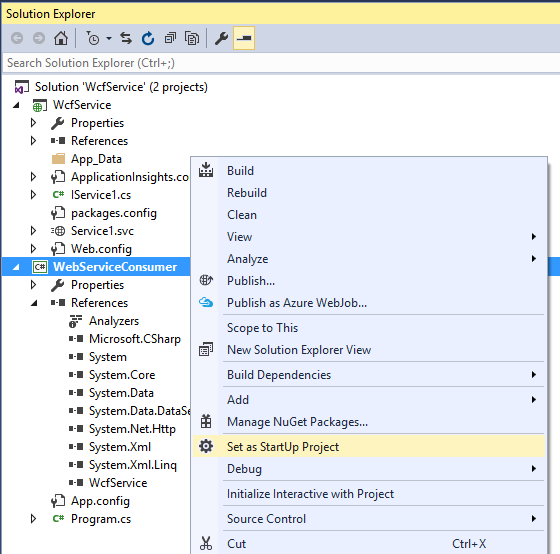
Set the Console app to be the start up application:
And finally modify Program.cs in order to consume the service:
using System;
using WcfService;

namespace WebServiceConsumer
{
   internal static class Program
   {
      private static void Main()
      {
         var service = new Service1();

         Console.Write(service.HelloWorld());
      }
   }
}