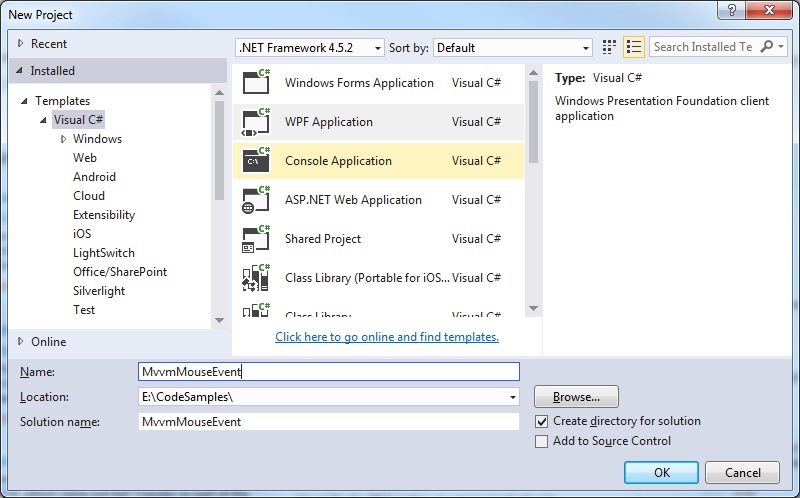
Step 1: Create a new WPF project
Step 2: Install MVVM Light
Select Tools > NuGet Package Manager
At the prompt type:
Install-Package MvvmLight
Step 3: Add event handling code
See this link for reference
https://www.technical-recipes.com/2016/using-relaycommand-icommand-to-handle-events-in-wpf-and-mvvm/
Right click your project folder and select Add > New Item > Class to add the following three classes:
RelayCommand.cs
using System;
using System.Windows.Input;

namespace MvvmMouseEvent
{
   public class RelayCommand<T> : ICommand
   {
      private readonly Predicate<T> _canExecute;
      private readonly Action<T> _execute;

      public RelayCommand(Action<T> execute)
         : this(execute, null)
      {
         _execute = execute;
      }

      public RelayCommand(Action<T> execute, Predicate<T> canExecute)
      {
         if (execute == null)
            throw new ArgumentNullException("execute");
         _execute = execute;
         _canExecute = canExecute;
      }

      public bool CanExecute(object parameter)
      {
         return (_canExecute == null) || _canExecute((T) parameter);
      }

      public void Execute(object parameter)
      {
         _execute((T) parameter);
      }

      public event EventHandler CanExecuteChanged
      {
         add { CommandManager.RequerySuggested += value; }
         remove { CommandManager.RequerySuggested -= value; }
      }
   }
}
EventRaiser.cs
using System;

namespace MvvmMouseEvent
{
   public static class EventRaiser
   {
      public static void Raise(this EventHandler handler, object sender)
      {
         if (handler != null)
         {
            handler(sender, EventArgs.Empty);
         }
      }

      public static void Raise<T>(this EventHandler<EventArgs<T>> handler, object sender, T value)
      {
         if (handler != null)
         {
            handler(sender, new EventArgs<T>(value));
         }
      }

      public static void Raise<T>(this EventHandler<T> handler, object sender, T value) where T : EventArgs
      {
         if (handler != null)
         {
            handler(sender, value);
         }
      }

      public static void Raise<T>(this EventHandler<EventArgs<T>> handler, object sender, EventArgs<T> value)
      {
         if (handler != null)
         {
            handler(sender, value);
         }
      }
   }
}
EventArgs.cs
using System;

namespace MvvmMouseEvent
{
   public class EventArgs<T> : EventArgs
   {
      public EventArgs(T value)
      {
         Value = value;
      }

      public T Value { get; private set; }
   }
}
Step 4: Create the ViewModel class for the main window
Select Add > New Item > Class.
MainWindowViewModel.cs
using System.Windows;
using System.Windows.Input;
namespace MvvmMouseEvent
{
public class MainWindowViewModel
{
private ICommand _mouseClick;
public ICommand MouseClick
{
get
{
return _mouseClick ?? (_mouseClick = new RelayCommand<object>(
x => { DoStuffWhenMouseClicked(); }));
}
}
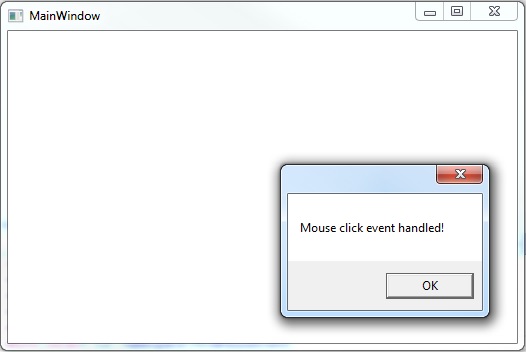
private static void DoStuffWhenMouseClicked()
{
MessageBox.Show("Mouse click event handled!");
}
}
}
Step 5: Update the MainWindow.xaml
Note that MvvmLight (like Prism) also allows us to pass event arguments to the command too.
MainWindow.xaml
<Window x:Class="MvvmMouseEvent.MainWindow"
        xmlns="http://schemas.microsoft.com/winfx/2006/xaml/presentation"
        xmlns:x="http://schemas.microsoft.com/winfx/2006/xaml"
        xmlns:d="http://schemas.microsoft.com/expression/blend/2008"
        xmlns:mc="http://schemas.openxmlformats.org/markup-compatibility/2006"
        xmlns:local="clr-namespace:MvvmMouseEvent"
        xmlns:i="http://schemas.microsoft.com/expression/2010/interactivity"
        xmlns:command="http://www.galasoft.ch/mvvmlight"
        mc:Ignorable="d"
        Title="MainWindow" Height="350" Width="525">

    <Window.DataContext>
        <local:MainWindowViewModel />
    </Window.DataContext>

    <Grid>
        <Border Background="Transparent">
            <i:Interaction.Triggers>
                <i:EventTrigger EventName="PreviewMouseDown">
                    <command:EventToCommand Command="{Binding MouseClick}"
                                            PassEventArgsToCommand="True" />
                </i:EventTrigger>
            </i:Interaction.Triggers>
        </Border>
    </Grid>
</Window>
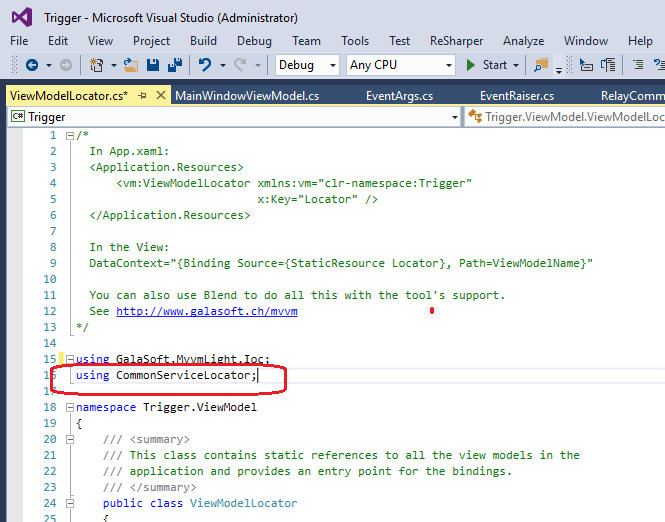
Step 6: Sort out any compiler issues!
On installing MvvM Light, into your Visual Studio project you may get a few compiler whinges.
On my setup, I found that I had to make sure the CommonServiceLocator reference to the automatically generated ViewModelLocator.cs file:
Step 7: Try it!
Run the program to see that a bog-standard WPF window is generated. Click anywhere on the area to see that the
mouse click event is handled as requested: