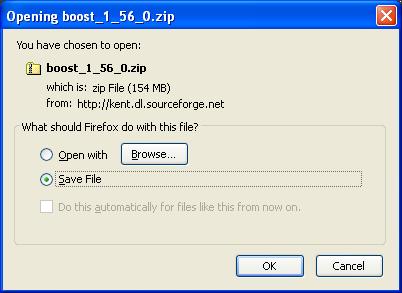
In this guide we will use boost::format, a Boost library requiring no separate compilation. If you do not already have Boost installed, the first task is to download and extract the Boost zip file to a destination of your choice. Official releases of Boost may be obtained from here:
http://www.boost.org/users/download/.
Download and extract the zip file to your destination of choice:
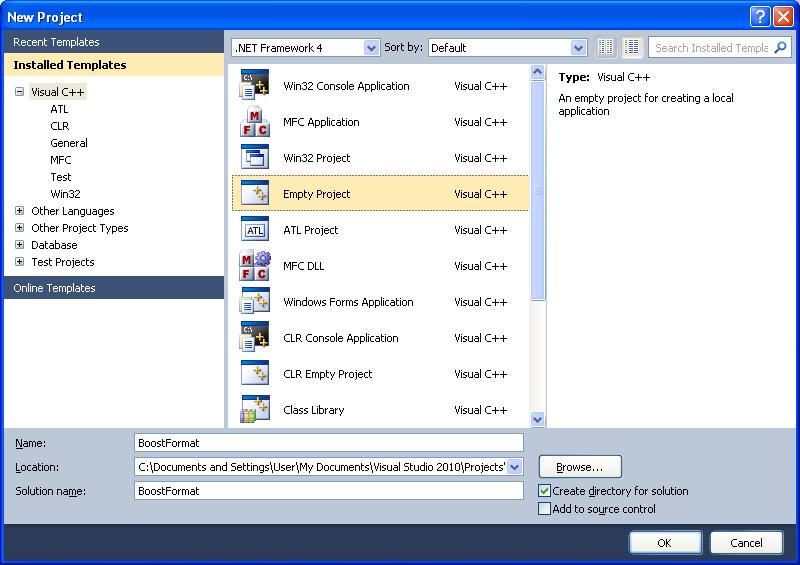
In Visual Studio create an empty project by selecting File > New > Project. In the ‘New Project’ dialog that appears, set the ‘Create directory for solution’ checkbox and give your project a name:
Now that the empty project is created, add some code to it. In Visual Studio, right-click the project folder and select Add > New Item… In the ‘Add New Item’ dialog that appears, select C++ File and name it as ‘main.cpp’:

Now insert the following code snippet into main.cpp, a program used to format and output and array of hexadecimal values:
#include <iostream>
#include <boost/format.hpp>

int main()
{
    unsigned int arr[5] = { 0x05, 0x04, 0xAA, 0x0F, 0x0D };

    std::cout << boost::format("%02X-%02X-%02X-%02X-%02X")
            % arr[0]
            % arr[1]
            % arr[2]
            % arr[3]
            % arr[4]
         << endl;
}
Notice that build errors occur if we try to build the Visual Studio project without having first specified the additional includes required to use the Boost libraries:
fatal error C1083: Cannot open include file: 'boost/format.hpp': No such file or directory
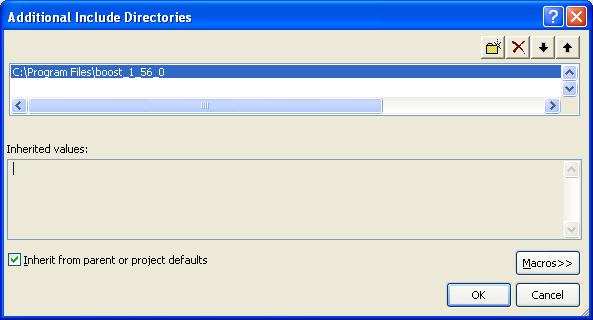
To do this, right-click your project folder in Visual Studio and select ‘Properties’. In the C++ > General tab edit the Additional Include Directories section:
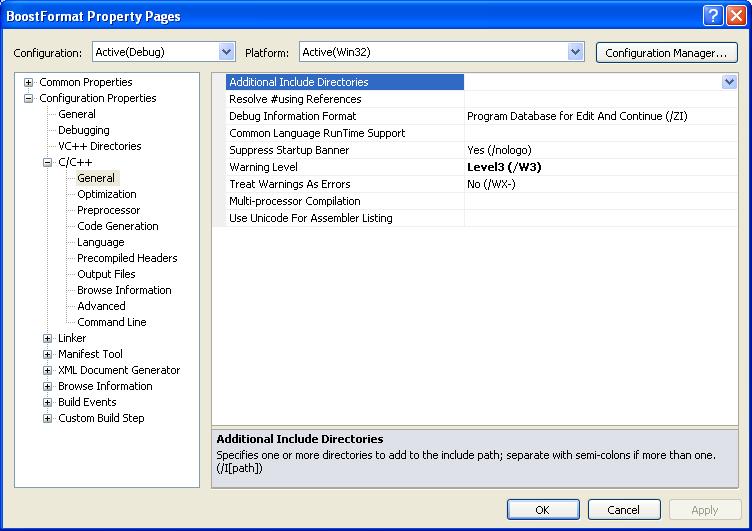
Then tell Visual Studio where your Boost library include files reside:
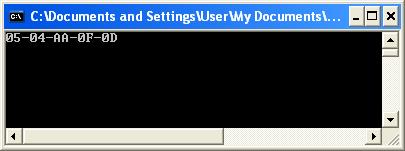
Your program should now successfully compile. Debugging the program gives us the following output: