A quick guide to setting up and installing OpenCV for using in the Netbeans integrated development environment in Linux.
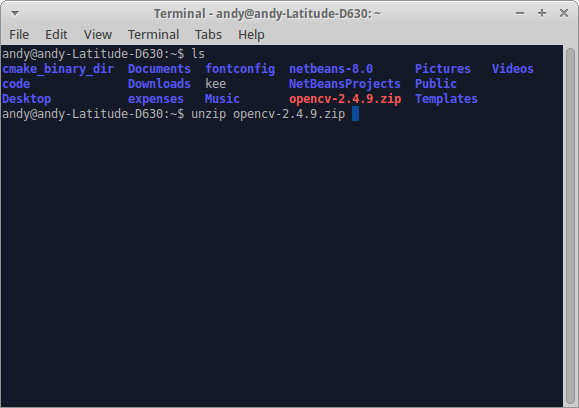
Step 1: Download and extract OpenCV for Linux
Versions of OpenCV can be downloaded from here:
http://opencv.org/downloads.html
Save it to the location of your choice. Open a command prompt, navigate to the download location and unzip:
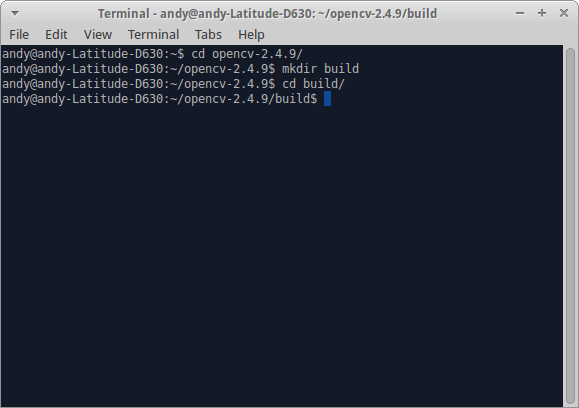
Step 2: Create an OpenCV build directory
Navigate to the OpenCV directory, and use
mkdir
to create the build directory:
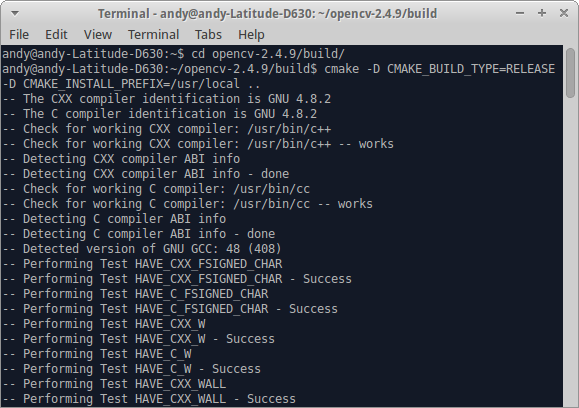
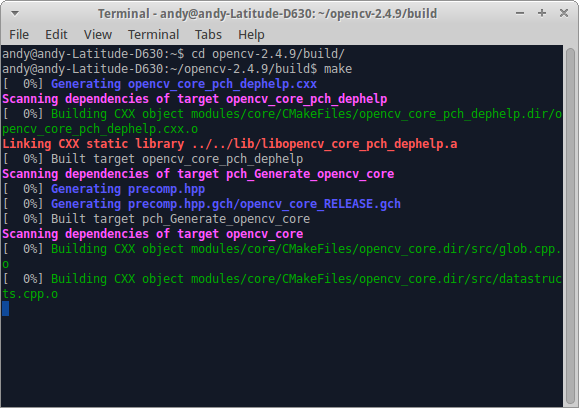
Step 3: Use CMake to build OpenCV
Navigate to the ‘build’ directory created and run the following CMake command:
cmake -D CMAKE_BUILD_TYPE=RELEASE -D CMAKE_INSTALL_PREFIX=/usr/local ..
And then run
make
command, which can take a while to complete:
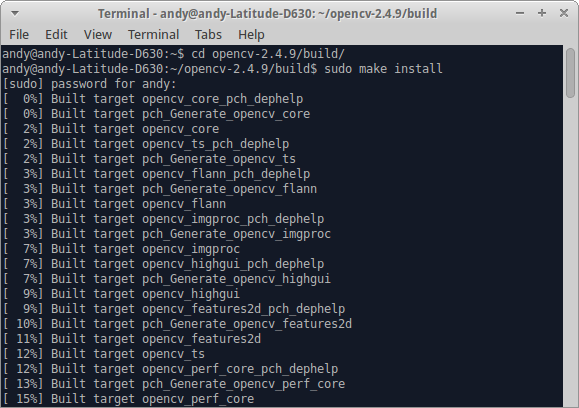
Followed by the
sudo make install
command:
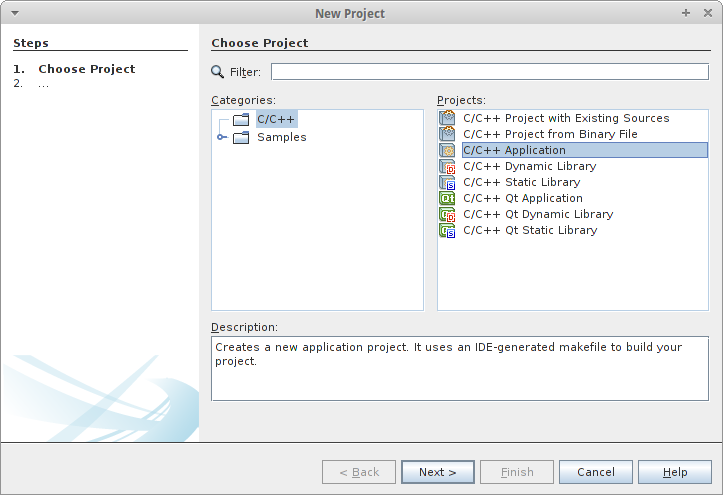
Step 4: Create a Netbeans Project
Open the NetBeans IDE and select File > New > Project. Select Empty Project:
Click Next and give the project a name:

And press Finish.
Once the project is created, select File > New > Empty File, to add the main.cpp file to the project. Copy and paste the following code example to main.cpp:
// DetectBlobs.cpp : Defines the entry point for the console application.
//
#include <cv.h>
#include <cxcore.h>
#include <highgui.h>

int main()
{
    // Initialise
    //std::string filepath = "spots.bmp";
    std::string filepath = "spots2.jpg";
    int num_blobs = 0;

    // Load grayscale version of coloured input image
    IplImage* original  = cvLoadImage( filepath.c_str() );
    IplImage* grayscale = cvLoadImage( filepath.c_str(),
                                       CV_LOAD_IMAGE_GRAYSCALE );

    // Check bitmap image exists
    assert( grayscale );

    // Create IplImage struct for a black and
    // white (binary) image
    IplImage* img_bw = cvCreateImage( cvGetSize( grayscale ),
                                      IPL_DEPTH_8U,
                                      1 );

    // Use thresholding to convert grayscale image
    // into binary
    cvThreshold( grayscale,             // source image
                 img_bw,                // destination image
                 40,                    // threhold val.
                 255,                   // max. val
                 CV_THRESH_BINARY );    // binary

    // Create IplImage struct for inverted black
    // and white image
    IplImage* img_bw_inv = cvCloneImage( img_bw );
    IplImage* img_bw_cpy = cvCloneImage( img_bw );

    // Find connected components using OpenCV
    CvSeq* seq;
    CvMemStorage* storage = cvCreateMemStorage( 0 );
    cvClearMemStorage( storage );

    // cvFindContours the 12 + 1 extra object for
    // white backgrounds and black spots, hence
    // subtract 1
    num_blobs = cvFindContours( img_bw,
                                storage,
                                &seq,
                                sizeof( CvContour ),
                                CV_RETR_LIST,
                                CV_CHAIN_APPROX_NONE,
                                cvPoint( 0, 0 ) ) - 1;

    // Display the input / output windows and images
    cvNamedWindow( "original" );
    cvShowImage( "original", original );

    cvNamedWindow( "grayscale" );
    cvShowImage( "grayscale", grayscale );

    cvNamedWindow( "black_and_white" );
    cvShowImage( "black_and_white",
                  img_bw_cpy );

    // Wait for user key press and then tidy up
    cvWaitKey(0);

    cvReleaseImage( &original );
    cvReleaseImage( &grayscale );
    cvReleaseImage( &img_bw );
    cvReleaseImage( &img_bw_inv );
    cvReleaseImage( &img_bw_cpy );

    cvDestroyWindow( "greyscale" );
    cvDestroyWindow( "black_and_white" );
    cvDestroyWindow( "inverted" );

    return 0;
}
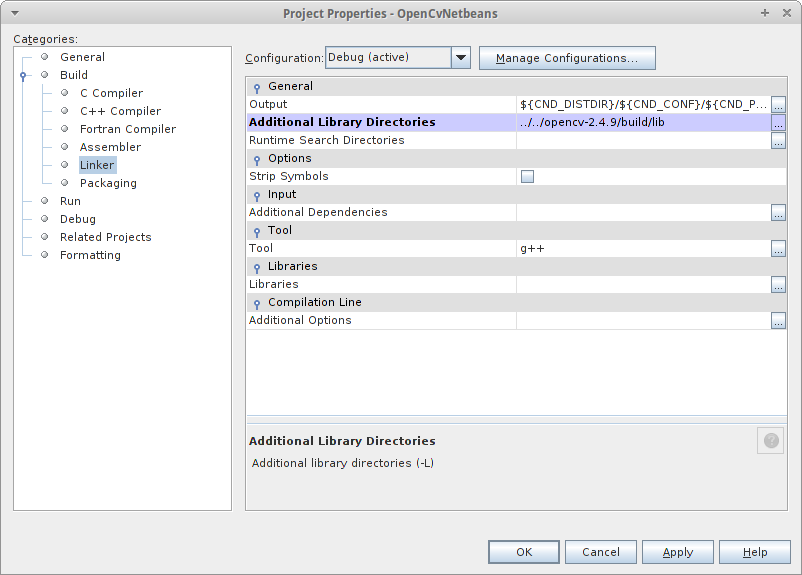
Step 5: Configure project settings
Right click the project folder and select Properties.
Select C++ Compiler > Include Directories. Set this to “../../opencv-2.4.9/include/”

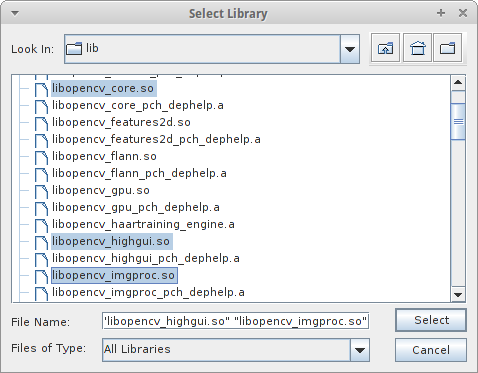
Then select Linker > Additional Library Directories to set the location of the OpenCV libraries, in the build/lib folder that was created using CMake earlier:
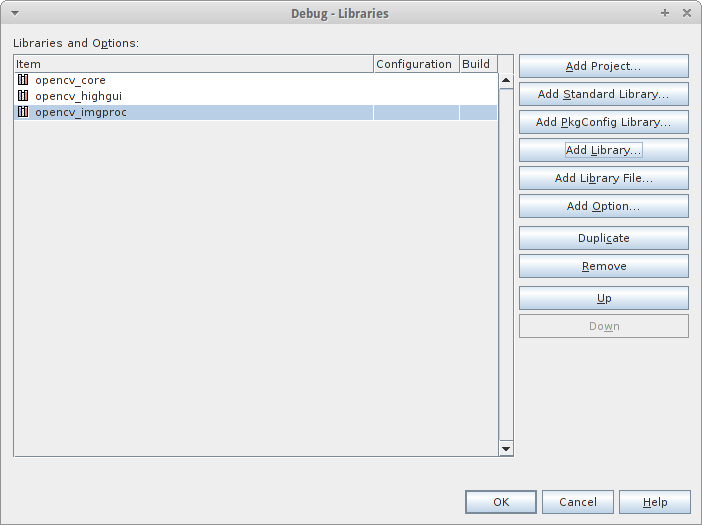
Select Linker > Libraries > Add Library. Set the libraries that you will need to include, in this example these are core, highgui and imgproc:
Click Apply and OK. These steps once completed should be sufficient to enable the project to build correctly.
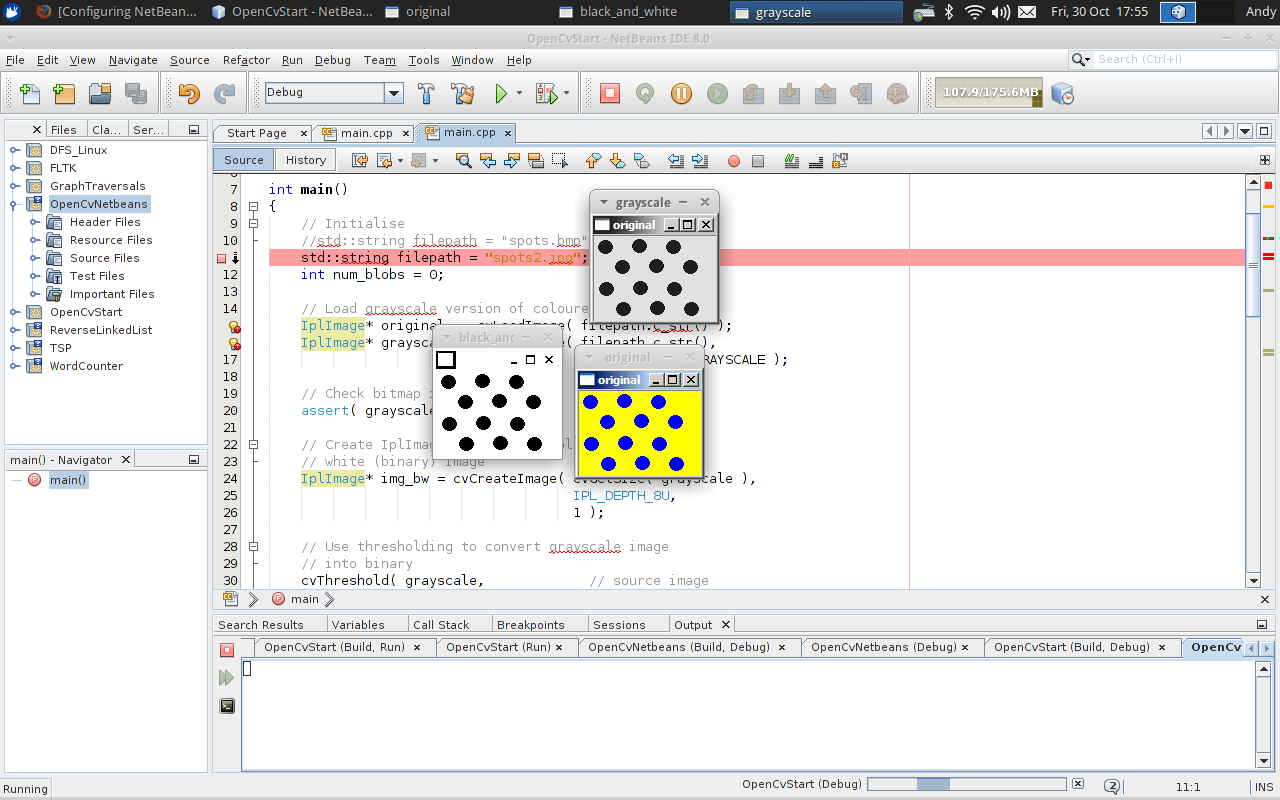
Step 6: Try it!
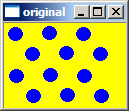
This is the “spots2.jpg’ image used in this test program (obviously, save the file in a place where your NetBeans project can find it):
And this screenshot shows the results of running the program, giving us the original colour image, the gray-scale equivalent image and the thresholded black and white image (and hence detect the number of spots in the jpg image):