Here is some of their online documentation on how to use the WiX Toolset to create installers:
https://www.firegiant.com/wix/tutorial/getting-started
Here is a quick and concise guide to set up using the WiX Toolset in a Visual Studio project, in order to create installation packages, from start to finish.
Step 1: Install WiX Toolset
First make sure you have installed the WiX toolset from the following site:
http://wixtoolset.org/releases/
WiX Toolset when run looks like this:

WiX Toolset to create installers
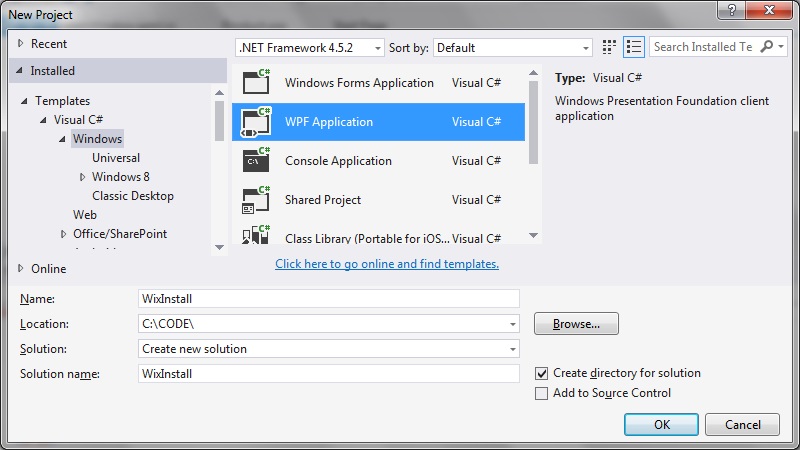
Step 2: Create a new Visual Studio project
In this example I’m creating a new WPF application:
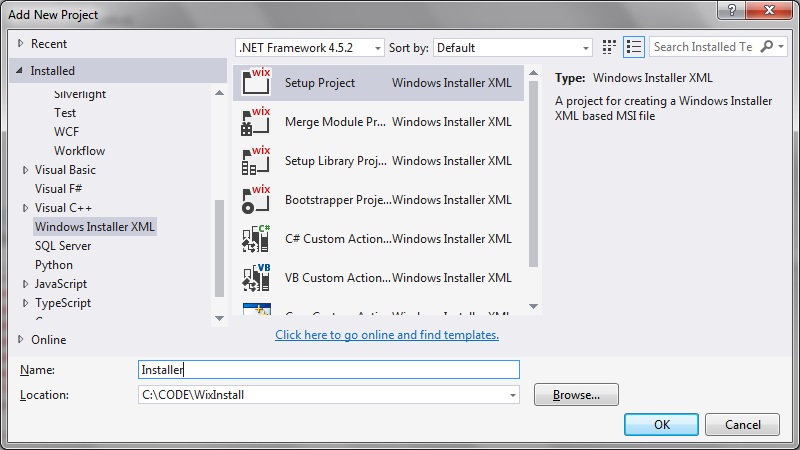
Step 3: Add a WiX installer project to the solution
Right click on your solution folder and select Add > New Project…
Select ‘Windows Installer XML’ > ‘Setup Project’ and give your installer project a name:
Step 4: generate GUID(s) for your .wxs file
The Product > Id field in the ‘Product.wxs’ file of this installer project needs to have a string value to uniquely identify it. There are plenty of tools you can use to generate this string.
I like this one:
https://www.guidgenerator.com/
Which generated for me:
[/code language=”txt”]
4495c49a-f6d0-4e28-9166-8158e708a13f
[/code]
(Please generate your own GUID, rather than copy this one)
Then update your ‘Product.wxs’ file, filling in the ‘Id’ and ‘Manufacturer’ fields eg:
<Product
    Id="4495c49a-f6d0-4e28-9166-8158e708a13f"
    Name="Installer"
    Language="1033"
    Version="1.0.0.0"
    Manufacturer="WiXInstaller"
    UpgradeCode="3dd34437-eb60-410c-bb1a-f17f077ccdd3">
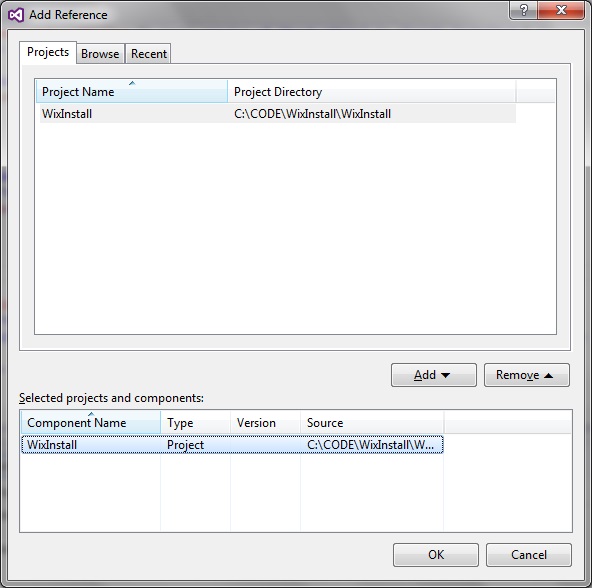
Step 5: Add the references to your installer project
In the Installer project, right-click the project folder and select Add > Reference.
Step 6: Set where to install your files
We need to be able to define where the program executable will get installed, plus any other files we wish to copy over as part of the installation.
In the ‘Component’ part of the Project.wxs file, remove the automatically generated comments and insert the definitions for the files you which to install, as well as the destination for these files. The complete Project.wxc file now looks lie this:
<?xml version="1.0" encoding="UTF-8"?>
<Wix xmlns="http://schemas.microsoft.com/wix/2006/wi">
	<Product
    Id="4495c49a-f6d0-4e28-9166-8158e708a13f"
    Name="Installer"
    Language="1033"
    Version="1.0.0.0"
    Manufacturer="WiXInstaller"
    UpgradeCode="3dd34437-eb60-410c-bb1a-f17f077ccdd3">

    <Package InstallerVersion="200" Compressed="yes" InstallScope="perMachine" />

		<MajorUpgrade DowngradeErrorMessage="A newer version of [ProductName] is already installed." />
		<MediaTemplate />

		<Feature Id="ProductFeature" Title="Installer" Level="1">
			<ComponentGroupRef Id="ProductComponents" />
		</Feature>
	</Product>

	<Fragment>
		<Directory Id="TARGETDIR" Name="SourceDir">
			<Directory Id="ProgramFilesFolder">
				<Directory Id="INSTALLFOLDER" Name="WixInstallerExample" />
			</Directory>
		</Directory>
	</Fragment>

	<Fragment>
		<ComponentGroup Id="ProductComponents" Directory="INSTALLFOLDER">
			<Component Id="ProductComponent">
        <File Source="$(var.WixInstall.TargetPath)" />
      </Component>
		</ComponentGroup>
	</Fragment>
</Wix>
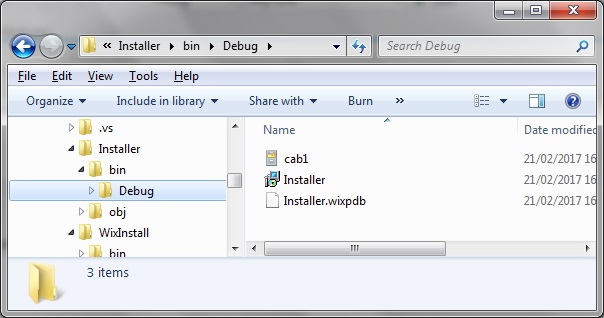
Step 7: Re-build both projects and try it out
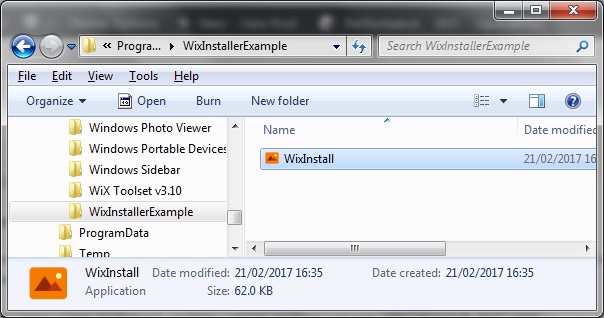
Upon re-building the ‘Install’ project, navigate to the bin/Debug folder and see that the Installer.msi file has been generated:
On running the msi installer file we can then see how the program executable and program folder both get installed to the C:\Program Files directory:
Adding additional files to the install
Besides the main executable, it is possible to include additional resource files to the install, such icon resources, dlls, etc. To do this, just update the ‘Component’ section of the Product.wxc – one way is to simple provide a relative path to the new file:
<Fragment>
	<ComponentGroup Id="ProductComponents" Directory="INSTALLFOLDER">
		<Component Id="MainExecutable" Guid="f5207608-9c81-4317-89de-061066ec863c">
			<File Source="$(var.WixInstall.TargetPath)" />
		</Component>

		<Component Id="icon.ico" Guid="7805267a-624b-41e7-baaf-49b82c0439cc">
			<File Id='icon.ico' Name='icon.ico' Source="..\WixInstall\icon.ico" KeyPath='yes' />
		</Component>
	</ComponentGroup>
</Fragment>
To create a subdirectory within the Installation folder
You need to:
1. Nest the subfolder underneath INSTALLFOLDER
2. Create the Feature Component with the CreateFolder bit inside.
Example code:
<Fragment>
	<Directory Id="TARGETDIR" Name="SourceDir">
		<Directory Id="ProgramFilesFolder">
			<Directory Id="INSTALLFOLDER" Name="WixInstallerExample" >
				<Directory Id="test" Name="AnotherDirectory">
					<Component Id="test" Guid="e29f1a9e-3ede-40d6-aba0-bfe451002ee3"
					  SharedDllRefCount="no" KeyPath="no" NeverOverwrite="no" Permanent="no" Transitive="no" Win64="no" Location="either">
						<CreateFolder/>
					</Component>
				</Directory>
			</Directory>
		</Directory>
	</Directory>

	<Feature Id="test" Title="testfolder" Level="1">
		<ComponentRef Id="test"/>
	</Feature>
</Fragment>