Pre-requisite
Sounds obvious, but before you start, make sure you have Python installed. You can download it from from here:
https://www.python.org/downloads/
I quite like using Notepad++ for testing my Python scripts, you can get it from here:
https://notepad-plus-plus.org/downloads/
So in Windows for example, test if you have Python installed by using the ‘–version’ command:
Shortcuts to examples covered in this Python cheat-sheet are as follows:
1. Convert json string to a Python dictionary using json.loads()
2. Clean up and prettify an XML string using regex and lxml.etree
3. Convert dictionary into prettified XML
4. Simple REST API requests
5. Using command line arguments
6. Suppress warnings about certificate verification
7. Pretty print table data using tabulate
8. Redirect print output to a file
9. Iterate over dictionary items
10. Filter items
11.
12.
13.
14.
15.
1. Convert json string to a Python dictionary using json.loads() (Back to top)
To avoid end-of-line type errors, remember that strings crossing multiple lines must begin and end with three single or multiple quotes: ”’ or “””.
json.loads converts the string into a Python dictionary, whose contents we can reference by key:
import json

json_str = '''{
    "name": "John",
    "age": 30,
    "city": "New York"
}'''

dictionary = json.loads(json_str)
print(dictionary["name"])

for key in dictionary:
   print("Key: {} Value: {}".format(key, dictionary[key]))
Output:
John
Key: name Value: John
Key: age Value: 30
Key: city Value: New York
2. Clean up and prettify an XML string using regex and lxml.etree (Back to top)
Sample code to strip away whitespaces, tabs, newlines etc between the angle brackets and prettify the end result.
import re
from lxml import etree

xml_str = '''                       <ins_api> <version>1.0</version>
  <type>cli_show</type>   <chunk>0</chunk>
   <sid>sid</sid>
     <input>show version</input>
 <output_format>xml</output_format>
                   </ins_api>'''

xml_str = re.sub(r">[\s\r\n\t]*<", "><", xml_str)
root = etree.fromstring(xml_str)
print(etree.tostring(root, pretty_print=True).decode())
Output:
<ins_api>
  <version>1.0</version>
  <type>cli_show</type>
  <chunk>0</chunk>
  <sid>sid</sid>
  <input>show version</input>
  <output_format>xml</output_format>
</ins_api>
3. Convert dictionary into prettified XML (Back to top)
from dicttoxml import dicttoxml
from lxml import etree
import json

data = {
  "configMethod":
  {
    "attributes":
    {
      "inParameter1":"value1",
      "inParameter2":"value2",
      "inParameter3":"value3"
    }
  }
}

xml = dicttoxml(data)
print(etree.tostring(etree.fromstring(xml), pretty_print=True).decode())
Output:
<root>
  <configMethod type="dict">
    <attributes type="dict">
      <inParameter1 type="str">value1</inParameter1>
      <inParameter2 type="str">value2</inParameter2>
      <inParameter3 type="str">value3</inParameter3>
    </attributes>
  </configMethod>
</root>
4. Simple REST API requests (Back to top)
Use the requests import to send RESTful commands like GET, POST, DELETE etc.
Simple example to (optionally) print the whole response, which is an array of json objects, and/or
output an indexed part of it.
import requests
import json

api_url = "https://jsonplaceholder.typicode.com/todos"
response = requests.get(api_url).json()

for item in response:
   print(item)
Output:
{'userId': 1, 'id': 1, 'title': 'delectus aut autem', 'completed': False}
{'userId': 1, 'id': 2, 'title': 'quis ut nam facilis et officia qui', 'completed': False}
{'userId': 1, 'id': 3, 'title': 'fugiat veniam minus', 'completed': False}
{'userId': 1, 'id': 4, 'title': 'et porro tempora', 'completed': True}
{'userId': 1, 'id': 5, 'title': 'laboriosam mollitia et enim quasi adipisci quia provident illum', 'completed': False}
{'userId': 1, 'id': 6, 'title': 'qui ullam ratione quibusdam voluptatem quia omnis', 'completed': False}
{'userId': 1, 'id': 7, 'title': 'illo expedita consequatur quia in', 'completed': False}
{'userId': 1, 'id': 8, 'title': 'quo adipisci enim quam ut ab', 'completed': True}
{'userId': 1, 'id': 9, 'title': 'molestiae perspiciatis ipsa', 'completed': False}
{'userId': 1, 'id': 10, 'title': 'illo est ratione doloremque quia maiores aut', 'completed': True}
.. etc
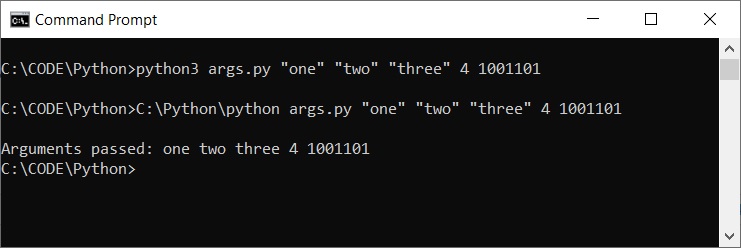
5. Using command line arguments (Back to top)
Using sys.argv
import sys

print("\nArguments passed:", end = " ")
for i in range(1, len(sys.argv)):
    print(sys.argv[i], end = " ")
Output:
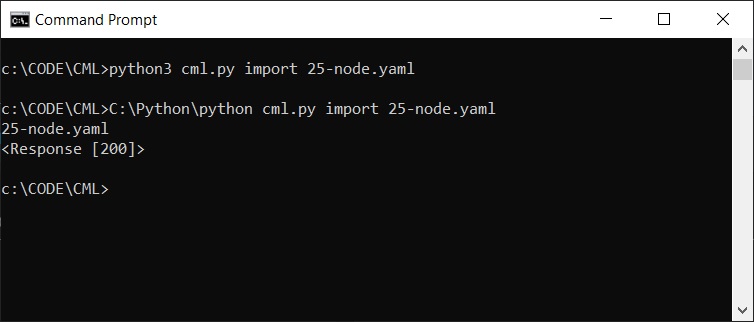
6. Suppress warnings about certificate verification (Back to top)
from requests.packages.urllib3.exceptions import InsecureRequestWarning
requests.packages.urllib3.disable_warnings(InsecureRequestWarning)
So before suppressing warning you may get a warning like this:
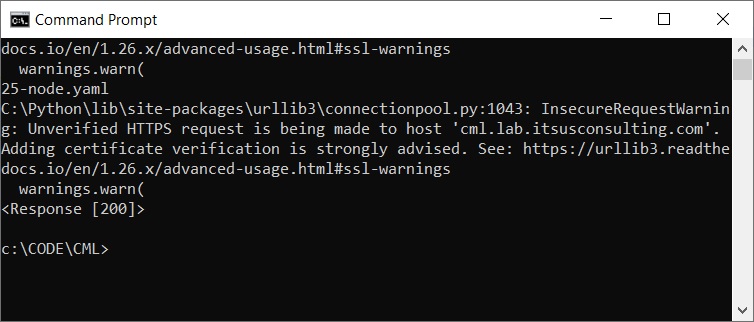
And after inserting the lines of code this warning is made to disappear:
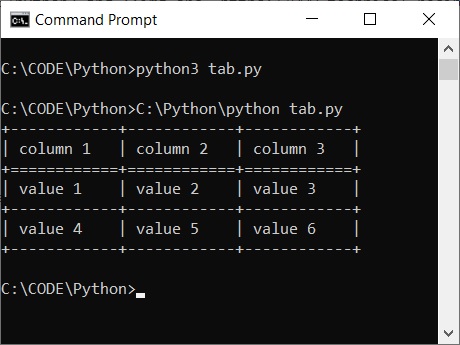
7. Pretty print table data using tabulate (Back to top)
Install using:
pip install tabulate
Code sample:
from tabulate import tabulate

rows = [["value 1", "value 2", "value 3"], ["value 4", "value 5", "value 6"]]
headers = ["column 1", "column 2", "column 3"]
table = tabulate(rows, headers, tablefmt="grid")
print(table)
Output:
8. Redirect print output to a file (Back to top)
The way to do this would be to print to a file object (Python3):
with open("./Test Results/pyats_testbed.yaml", "w") as f:
    f.write(pyats_testbed.text)
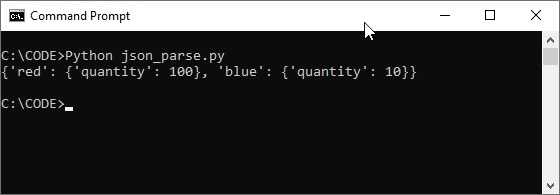
9. Iterate over dictionary items (Back to top)
Example to iterate over a desired part of a Python dictionary and insert the key-value pairs into a dictionary.
import json

record= {
    "shirt": {
        "red": {
            "quantity": 100,
        },
        "blue": {
            "quantity": 10
        }
    },
    "trousers": {
        "black": {
            "quantity": 50
        }
    }
}

data = dict((key, value) for key,value in record["shirt"].items())
print(data)
Output:
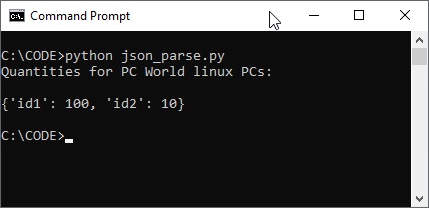
10. Filter items (Back to top)
i. Filter items/values from a Python dictionary.
In this example those “PC-WORLD” entries whose “os” field equals “linux”:
import json

record= {
    "PC-WORLD": {
        "id1": {
            "quantity": 100,
            "os" : "linux"
        },
        "id2": {
            "quantity": 10,
            "os" : "linux"
        },
        "id3": {
            "quantity": 100,
            "os" : "windows"
        }
    },
    "CURRYS": {
        "black": {
            "quantity": 50
        }
    }
}

linux_map = {}
linux_pcs = {key: value for (key, value) in record["PC-WORLD"].items() if value["os"] == "linux" }
for key, value in linux_pcs.items():
  linux_map[key] = value["quantity"]
print("Quantities for PC World linux PCs:\n")
print(linux_map)
Output:
Simpler still, just insert the specific value you are interested into the map:
linux_pcs = {key: value["quantity"] for (key, value) in record["PC-WORLD"].items() if value["os"] == "linux" }
print(linux_pcs)
ii. Filter strings from a string array
In this example we filter all names NOT containing the case-insensitive substring ‘dr’.
names=['Andrew','Adrian','Bob','Cedric','Drake', 'Fredrick']
filtered_names=[ name for name in names if 'dr' not in name.lower() ]
print(filtered_names)
Output:

11. Get dictionary keys as a string array (Back to top)
Python >= 3.5 offers the ability to unpack into a list literal:
map = {
    "id-111": {
        "name": "andy",
        "age": "30"
    },
    "id-222": {
        "name": "pete",
        "age": "34"
    },
    "id-333": {
        "name": "mike",
        "age": "23"
    }
}

ids = [*map]
print(ids)
Output:
['id-111', 'id-222', 'id-333']
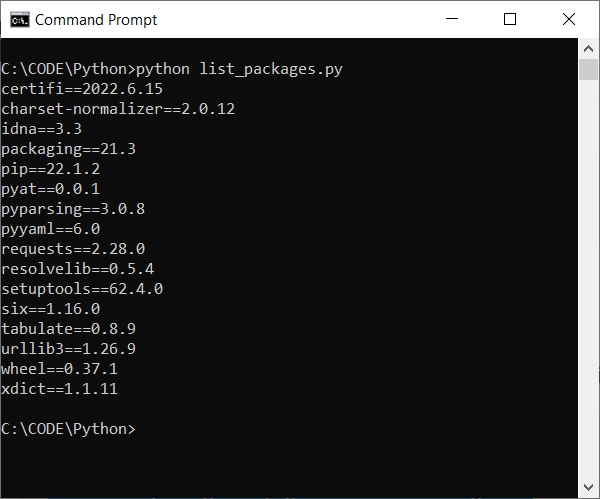
12. List installed python packages (Back to top)
import pkg_resources
installed_packages = pkg_resources.working_set
installed_packages_list = sorted(["%s==%s" % (i.key, i.version) for i in installed_packages])

for package in installed_packages_list:
  print(package)
Output:
13. Convert between json strings and Python dictionaries (Back to top)
From https://www.w3schools.com/python/python_json.asp
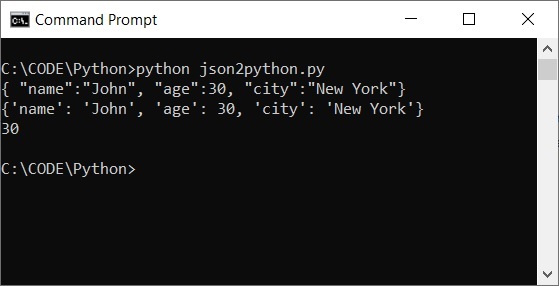
i) Take a JSON string and converts it to a Python dictionary using json.loads():
import json

# JSON:
x =  '{ "name":"John", "age":30, "city":"New York"}'
print(x)

# JSON to Python dictionary
y = json.loads(x)

print(y)
print(y["age"])
Output:
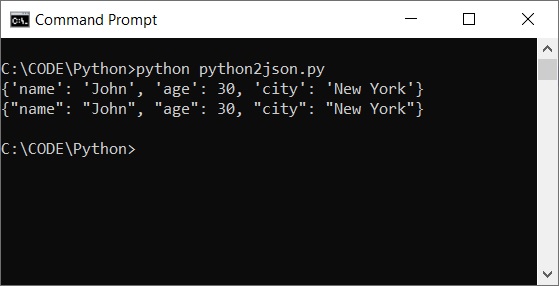
ii. Take a Python dictionary and convert it to a JSON string using json.dumps():
Once converted to a JSON string format you can no longer use like a dictionary as you can in the previous example.
import json

# Python:
x =  {
    'name': 'John',
    'age': 30,
    'city': 'New York'
}
print(x)

# Python dictionary to JSON string
y = json.dumps(x)
print(y)
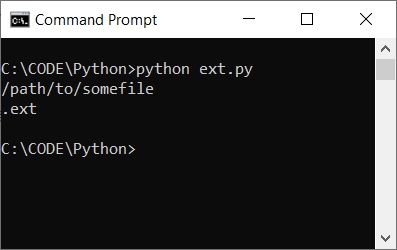
14. Extract file name and file extension (Back to top)
import os
filename, file_extension = os.path.splitext('/path/to/somefile.ext')
print(filename)
print(file_extension)
Output:
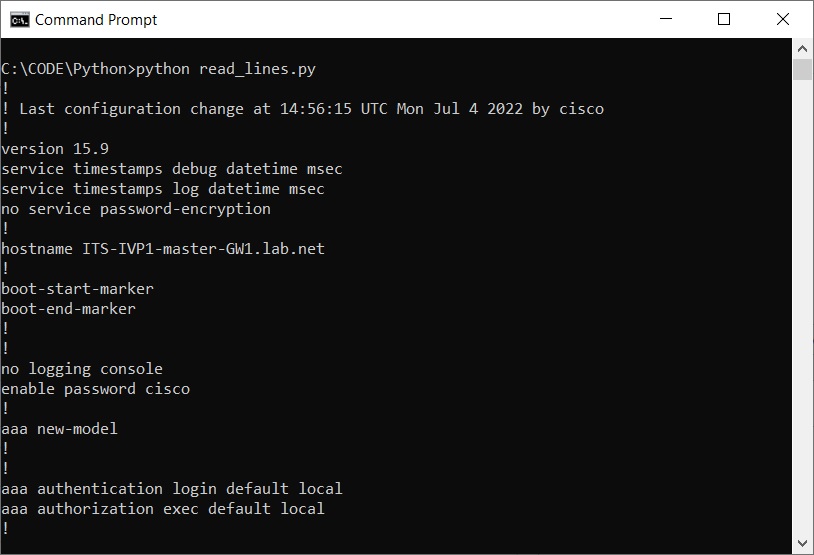
15. Read the lines of a text file into a list or array (Back to top)
Some good Stack Overflow solutions here:
https://stackoverflow.com/questions/3277503/how-to-read-a-file-line-by-line-into-a-list
I opted for the second highest voted answer, whereby lines are read in and the newline character(s) are stripped from each.
In this example, I read the contents of a Cisco config file into a string array and then print each string value to the console.
import csv

with open('C:\GIT\ivplus-runner-test\ivplus-runner-test\ConfigFiles\Cisco\IOSv\ITS-IVP1-GW1-running.cfg', 'r') as f:
  lines = [line.rstrip() for line in f]

for line in lines:
  print(line)
Output:
16. Compare two lists and determine which elements in the original list are missing and which have been added (Back to top)
first_list = ["abc", "xyz", "123", "111"]
second_list = ["abc", "xyz", "123", "000", "def"]

first_set = set(first_list)
second_set = set(second_list)

missing_items = list(first_set - second_set)
added_items = list(second_set - first_set)

print('missing items:')
for missing_item in missing_items:
  print(missing_item)

print()

print('added items:')
for added_item in added_items:
  print(added_item)
Output:

16. Basic dependency injection – a simple example.
One of the biggest benefits of dependency injection is that it gives us the ability to test a client class independently of the service class it might previously have had a dependency on
An example could be a UserManager client class that has a dependency on a SqlService class as the means to return a set of users.
Prior to decoupling these classes using dependency injection, if there was a requirement for the underlying user repository to change, such as switch from an SQL database to an Active Directory, we would have needed to create additional methods to handle the new repositories
And if we wanted to test UserManager class independently of the SqlService class we cannot, given that the tests in the UserManager class will require the setting up of SQL database set up.
dependency_injection.py
# Service #1
class SqlSvc():
  def __init__(self):
    # fill in how SQL db is populated
    self.db = ''
  def get_users(self):
    return ['123', 'XYZ']

# Service #1
class ADSvc():
  def __init__(self):
    # fill in how SQL db is populated
    self.db = ''
  def get_users(self):
    return ['AD1', 'AD2']

# Interface to SERVICE
class UserSvc():
  def __init__(self, svc):
    self.svc = svc
  def get_users(self):
    return self.svc.get_users()

# Client
class UserManager(UserSvc):
  def __init__(self, UserSvc):
    self.UserSvc = UserSvc
  def get_users(self):
    return self.UserSvc.get_users()

# Injector
class Injector():
  def inject():
    UserSvc = UserSvc(SqlSvc())
    users_manager = UserManager(UserSvc)
test_dependency_injection.py
from dependency_injection import UserManager, UserSvc, SqlSvc, ADSvc
class TestSvc():
def __init__(self):
pass
def get_users(self):
users = ['Alice', 'Bob']
return users
class TestSvcNoUsers():
def __init__(self):
pass
def get_users(self):
users = []
return users
def test_data():
test_data_1 = UserManager(UserSvc(TestSvc()))
test_data_2 = UserManager(UserSvc(SqlSvc()))
test_data_3 = UserManager(UserSvc(ADSvc()))
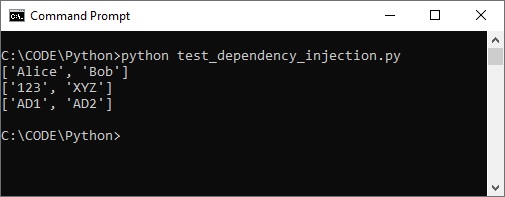
print(test_data_1.get_users())
print(test_data_2.get_users())
print(test_data_3.get_users())
test_data()
This test code demonstrates that the UserManager class can be tested independently of the service class, when desired, as shown by the result given for test_data_1 / TestSvc class:
Output:
17. Using tuples (Back to top)
Some examples of using a list and dictionary of tuples respectively.
tuple_array = []
i = 1;
j = 2
for k in range(1, 10):
tuple_array.append((i,j))
i += 1
j += 1
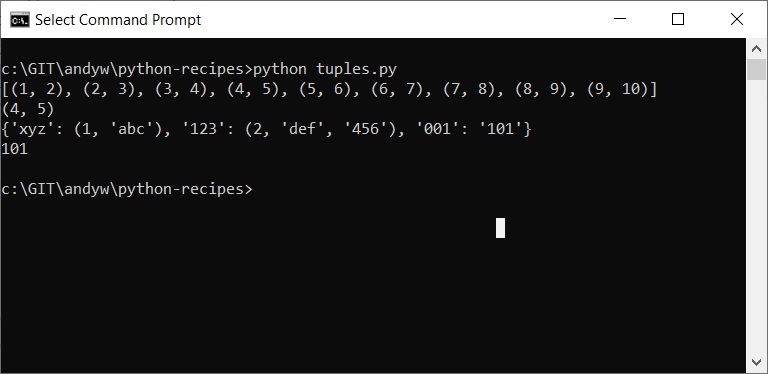
print(tuple_array)
print(tuple_array[3])
tuple_map = {}
tuple_map["xyz"] = (1, "abc")
tuple_map["123"] = (2, "def", "456")
tuple_map["001"] = ("101")
print(tuple_map)
print(tuple_map["001"])
Result:
18. Threads (Back to top)
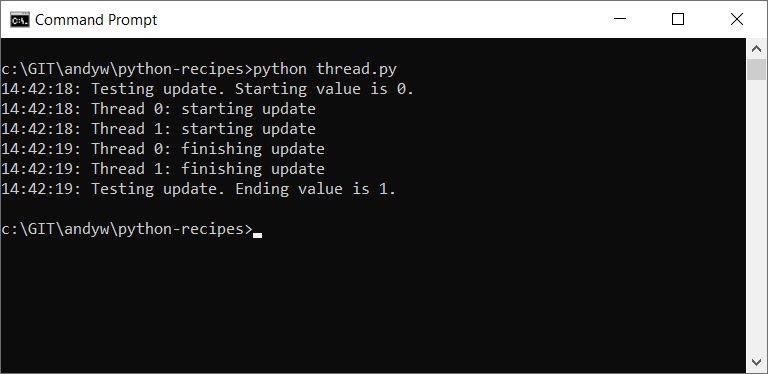
First of all a simple example of using threads that introduces a race condition.
In this example we would expect the final value to equal 2 given that the size of the thread pool is 2, and the index which is initially set to 0 is incremented by 1 each time. However the final shared value does not equal 2, it only equals 1. This is because the sleep() function inside update() causes the current thread to exit before it has finished updating the current shared value.
import logging
import threading
import time
import concurrent.futures

class FakeDatabase:
    def __init__(self):
        self.value = 0

    def update(self, name):
        logging.info("Thread %s: starting update", name)
        local_copy = self.value
        local_copy += 1
        time.sleep(0.1)
        self.value = local_copy
        logging.info("Thread %s: finishing update", name)


if __name__ == "__main__":
    format = "%(asctime)s: %(message)s"
    logging.basicConfig(format=format, level=logging.INFO,
                        datefmt="%H:%M:%S")

    database = FakeDatabase()
    logging.info("Testing update. Starting value is %d.", database.value)
    with concurrent.futures.ThreadPoolExecutor(max_workers=2) as executor:
        for index in range(2):
            executor.submit(database.update, index)
    logging.info("Testing update. Ending value is %d.", database.value)
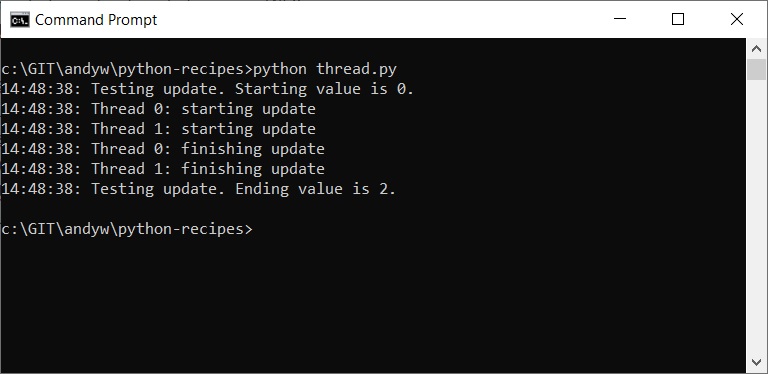
We can overcome this problem by the use of Lock, which is often used in conjunction with a context manager, so you can use it in a with statement, which means it gets released automatically when the with block exits for any reason.
import logging
import threading
import time
import concurrent.futures

class FakeDatabase:
    def __init__(self):
        self.value = 0
        self._lock = threading.Lock()

    def locked_update(self, name):
        logging.info("Thread %s: starting update", name)
        logging.debug("Thread %s about to lock", name)
        with self._lock:
            logging.debug("Thread %s has lock", name)
            local_copy = self.value
            local_copy += 1
            time.sleep(0.1)
            self.value = local_copy
            logging.debug("Thread %s about to release lock", name)
        logging.debug("Thread %s after release", name)
        logging.info("Thread %s: finishing update", name)

if __name__ == "__main__":
    format = "%(asctime)s: %(message)s"
    logging.basicConfig(format=format, level=logging.INFO,
                        datefmt="%H:%M:%S")

    database = FakeDatabase()
    logging.info("Testing update. Starting value is %d.", database.value)
    with concurrent.futures.ThreadPoolExecutor(max_workers=2) as executor:
        for index in range(2):
            executor.submit(database.locked_update, index)
    logging.info("Testing update. Ending value is %d.", database.value)
Which gives us the desired value of 2 for the shared value as shown:
Link: https://realpython.com/intro-to-python-threading/
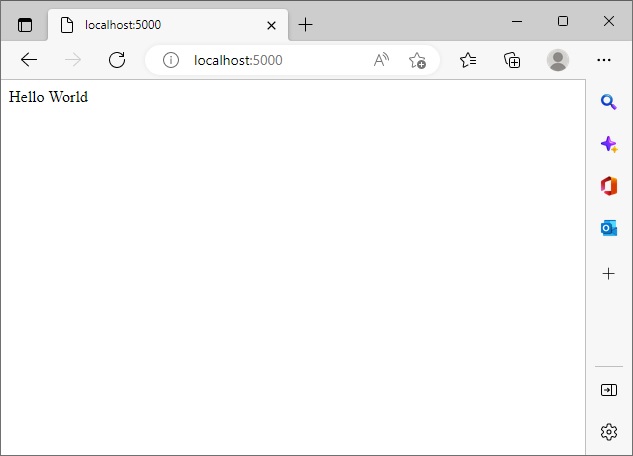
19. Create a web application using flask (Back to top)
Use the Flask module, a web application framework written in Python.
from flask import Flask

app = Flask(__name__)
@app.route('/')

def hello_world():
	return 'Hello World'

if __name__ == '__main__':
	app.run()
When running the app, the default port value is 5000. On running the application and navigating to localhost:5000 we should see the message appear on the browser screen:
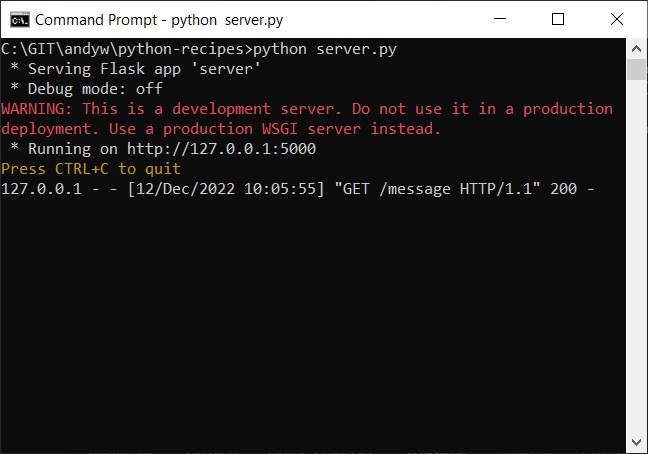
As a further demonstration, here’s how to configure a simple client-server setup to listen for incoming http requests and pring the json response:
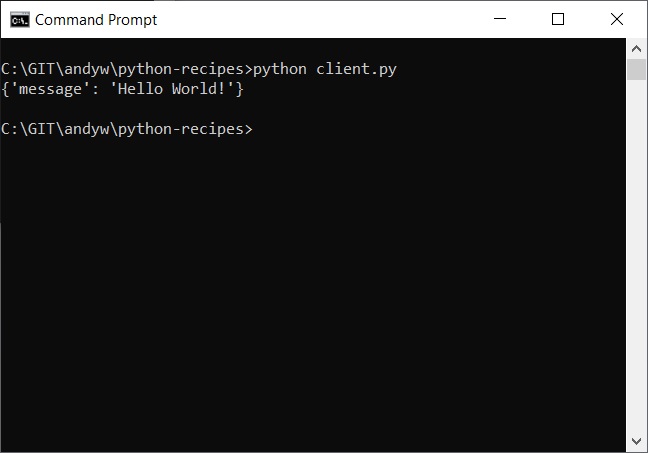
client.py
import requests

response = requests.get("http://127.0.0.1:5000/message")
print(response.json())
server.py
from flask import Flask
from flask import jsonify

app = Flask(__name__)

# Listen for http requests
@app.route('/message', methods=['GET'])
def message():
    return jsonify({'message' : 'Hello World!'})

if __name__ == "__main__":
    app.run()
So to demonstrate this example, spin up the client and server python applications in separate terminals (or however you like) and view the result:
20. Implementing a basic observer pattern (Back to top)
class Observer(object):
    def notify(self,*args,**kwargs):
        print(args,kwargs)

class Target(object):
    def __init__(self,*observers):
        self.observes = observers

    #this notify for every access to the function
    def event(self,data):
        for obs in self.observes:
            obs.notify('event', data)
        print("event with", data)

t = Target(Observer())
t.event(1)
Giving the following output:
('event', 1) {}
event with 1
21. Using websockets (Back to top)
client.ps
The client sends the event object through the websocket and asynchronously awaits the response.
On receiving the response from the server, it extracts the message contained therein and prints it.
import asyncio
import websockets
import json

async def event():
    async with websockets.connect("ws://localhost:8001") as websocket:
        event = { "title": "bandwidth",  "type": "reduction" }
        await websocket.send(json.dumps(event))
        message = await websocket.recv()
        print(message)

asyncio.run(event())
Output:
Message received from client: {"title": "bandwidth", "type": "reduction"}
server.ps
At the server end, the “localhost” address can be replaced with the IP address of your choice.
import asyncio
import websockets

async def handler(websocket):
    while True:
        try:
            message = await websocket.recv()
        except websockets.ConnectionClosedOK:
            break
        print(message)
        reply = f"Message received from client: {message}"
        await websocket.send(reply)

async def main():
    async with websockets.serve(handler, "localhost", 8001):
        await asyncio.Future()  # run forever

if __name__ == "__main__":
    asyncio.run(main())
Output:
{"title": "bandwidth", "type": "reduction"}
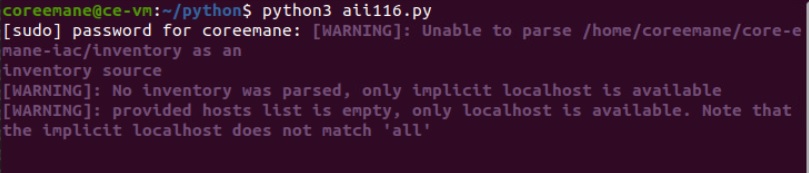
22. Using call to automate the entering of passwords (Back to top)
Sometimes, when doing automation work, we may wish to automate the entering of the root password without having to manually enter it at the prompt.
This might be in order to kick off some Linux command or other executable.
from subprocess import call
pwd='coreemane'
cmd='sudo service core-daemon start'
call('echo {} | sudo -S {}'.format(pwd, cmd), shell=True)
In this particular example, I was interested in running a service that prompts the user to first enter the password before continuing with
other automation tasks. As shown by the screenshot, the program was able to continue with the remaining scripts once this password was automatically entered:
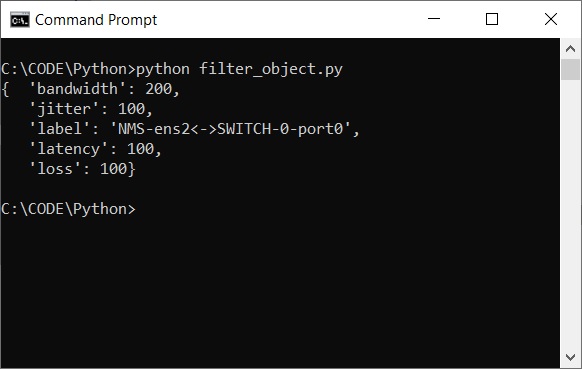
23. Extract subset of key-value pairs from dictionary object (Back to top)
A slight variation in the tutorialspoint example in that I use the “not” keyword as a means of excluding/filtering those key-value pairs I don’t want include in the updated object.
import pprint
link_obj = {
  "bandwidth": 200,
  "jitter": 100,
  "label": "NMS-ens2<->SWITCH-0-port0",
  "latency": 100,
  "loss": 100,
  "node_a_label": "NMS",
  "node_b_label": "SWITCH-0"
}
filter = { 'node_a_label', 'node_b_label' }
link = { key:value for key,value in link_obj.items() if key not in filter}
pp = pprint.PrettyPrinter(indent=3)
pp.pprint(link)
Giving the following output: