ChatOps enables you to perform operation tasks on the infrastructure.
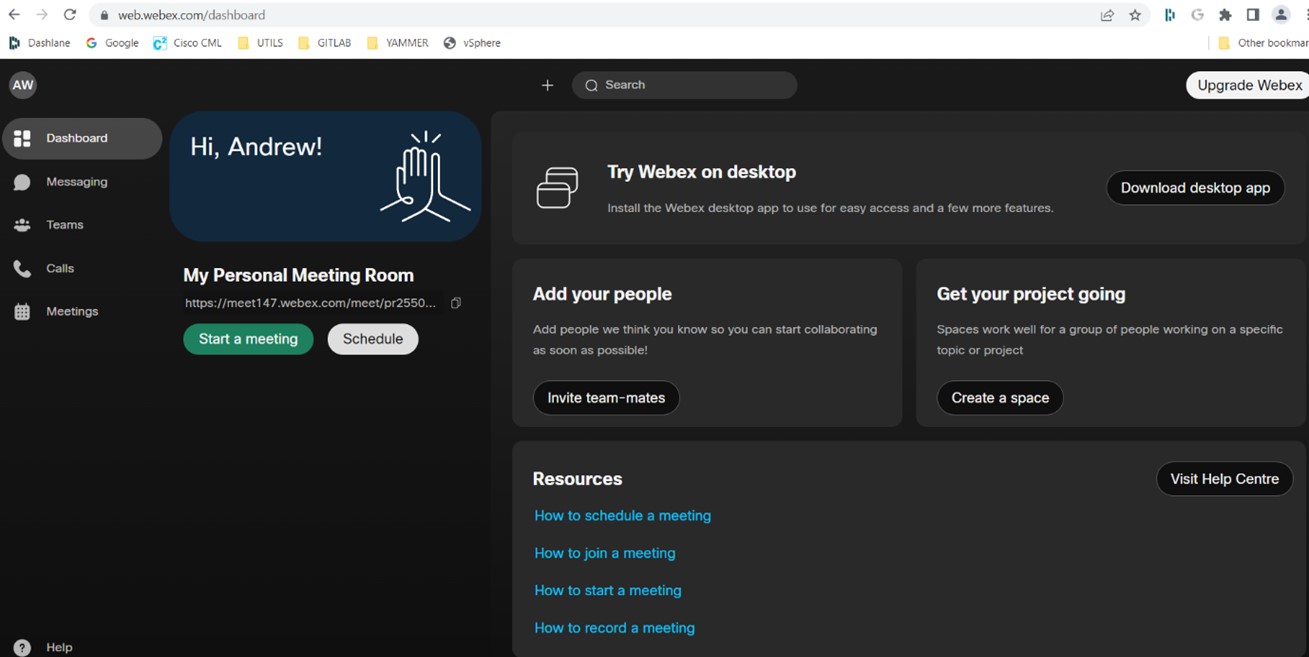
You need an active WebEx Teams account if you have not already set one up:
https://web.webex.com/
Here is a useful link on getting started with this topic if you find the Cisco documentation / training somewhat confusing, as I did:
https://blog.wimwauters.com/networkprogrammability/2020-10-06_chatbot_python_local/
Basically this example shows you how to create a python application to listen for incoming messages coming from WebEx chat bot, and on receiving a message, create a new POST REST API to send a reply to the Chat Op.
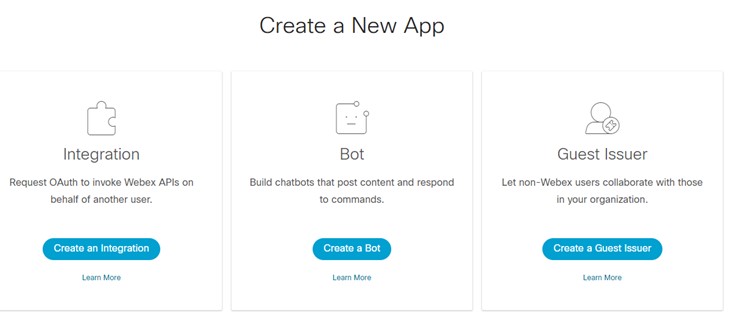
1. Create a bot
In the dashboard select visit help centre.
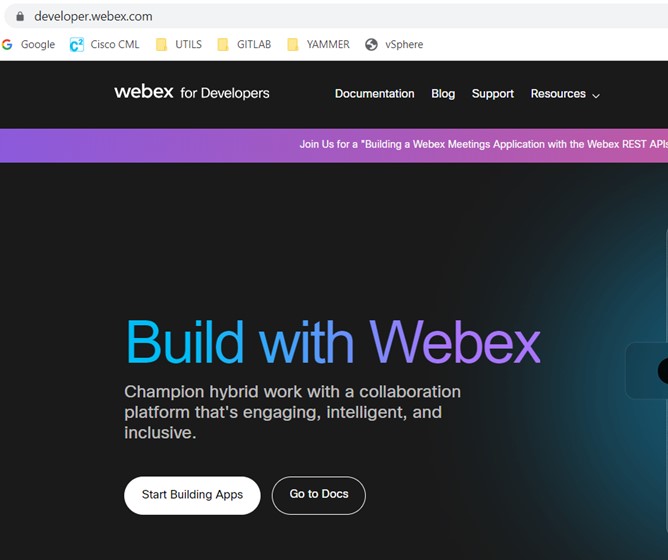
Sign in, then go to https://developer.webex.com/
Click on Start building Apps:
And select Create a Bot
Create the bot:
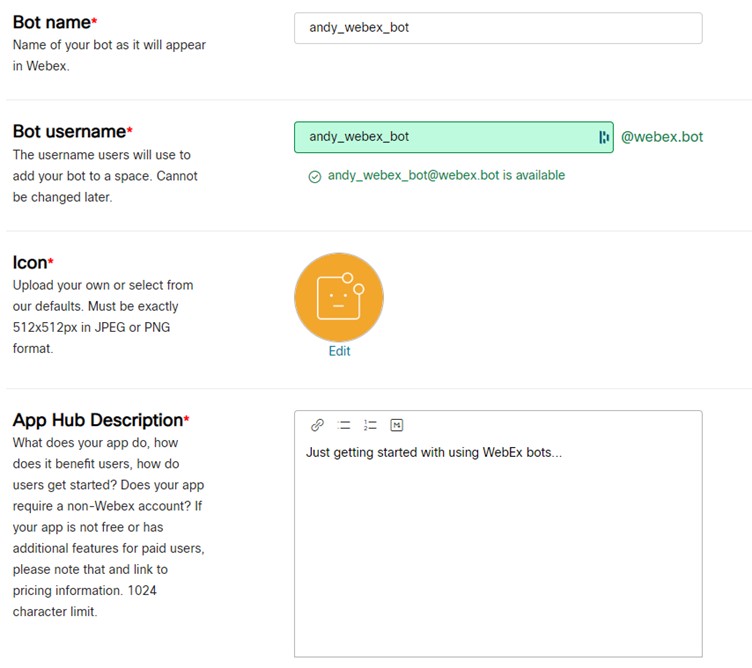
Copy the bot access token and store it somewhere.
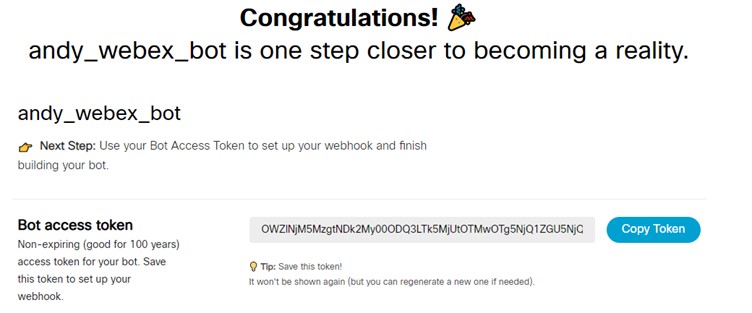
Save it somewhere given that this will be lost on closing the browser (though you can always generate and use a new one.)
Go back into teams.webex.com and create a new Space using the username you just created.
2. Create a Space
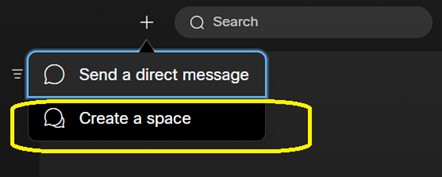
Then click on Create:

You can now send messages to the bot (but because we have not yet set up our code it will not yet respond.)
3. Create application to listen for http requests received from a bot
We wish to write an app than can receive and handle notifications received from WebEx Teams.
Open Visual Studio Code and create the Python code for a service to listen for http requests that are received from a bot
chatbot.py
The chatbot.py application is a http server used to listen for http GET/POST requests received from a WebEx bot. For this we use Flask, a web framework module written in Python that lets you develop web applications easily.
from flask import Flask, request, json
import requests
from messenger import Messenger

app = Flask(__name__)
port = 5005
msg = Messenger()

@app.route('/', methods=['GET', 'POST'])
def index():
    if request.method == 'GET':
        return f'Request received on local port {port}'
    elif request.method == 'POST':
        if 'application/json' in request.headers.get('Content-Type'):
            data = request.get_json()

            if msg.bot_id == data.get('data').get('personId'):
                return 'Message from self ignored'
            else:
                print(json.dumps(data,indent=4))
                msg.room_id = data.get('data').get('roomId')
                message_id = data.get('data').get('id')
                msg.get_message(message_id)

                if msg.message_text.startswith('/cards'):
                   reply = requests.get('https://deckofcardsapi.com/api/deck/new/shuffle/?deck_count=1').json()
                   msg.reply = reply['deck_id']
                   msg.post_message(msg.room_id, msg.reply)
                else:
                   msg.reply = f'Bot received message "{msg.message_text}"'
                   msg.post_message(msg.room_id, msg.reply)

                return data
        else:
            return ('Wrong data format', 400)

if __name__ == '__main__':
    app.run(host="0.0.0.0", port=port, debug=False)
And code to communicate with WebEx Teams API:
messenger.py
An application to read messages from and write messages to WebEx Teams.
Replace the value of api_key using the token you generated previously. The messenger.py file is used for communication with the Webex Teams API. The get_message method is used to extract text from received messages. The “postmessage” method is used to send a message to the API. chatbot.py first retrieves messages from API.
import json
import requests

# API Key is obtained from the Webex Teams developers website - replace with the bot access token generated for you
api_key = 'ZjJlMGIwZmMtNGMwMy00N2VjLWFjODYtYWRmZmJmMjRjOTUxYWFmNWU4NzAtMTFj_P0A1_5c03050b-7cee-42d0-87de-4da1c3469570'
# Webex Teams messages API endpoint
base_url = 'https://webexapis.com/v1/'

class Messenger():
    def __init__(self, base_url=base_url, api_key=api_key):
        self.base_url = base_url
        self.api_key = api_key
        self.headers = {
            "Authorization": f"Bearer {api_key}",
            "Content-Type": "application/json"
        }
        self.bot_id = requests.get(f'{self.base_url}/people/me', headers=self.headers).json().get('id')

    def get_message(self, message_id):
        """ Retrieve a specific message, specified by message_id """
        received_message_url = f'{self.base_url}/messages/{message_id}'
        self.message_text = requests.get(received_message_url, headers=self.headers).json().get('text')
        print(self.message_text)


    def post_message(self, room_id, message):
        """ Post message to a Webex Teams space, specified by room_id """
        data = {
            "roomId": room_id,
            "text": message,
            }
        post_message_url = f'{self.base_url}/messages'
        post_message = requests.post(post_message_url,headers=self.headers,data=json.dumps(data))
        print(post_message)
4. Create and expose tunneling
You need an application to listen for requests from a bot and to do this you need to expose your application to the internet. To do this, use the ngrok tool.
ngrok exposes the local port of an application with a public URL with the use of tunnelling.
From the terminal, type ngrok http 5005 to publically expose local port 5005.
Install from here if VS Code doesn’t recognise it, and add its path to your User environment variables:
This will then expose the url you need to access port 5005 on your local machine.
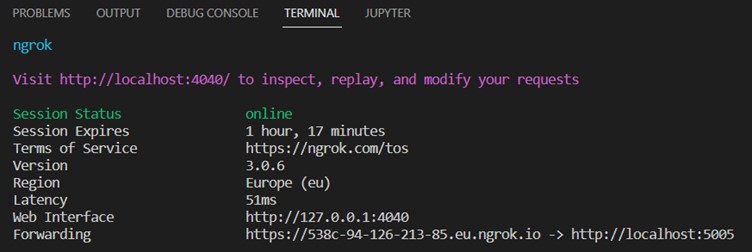
Copy the URL.
5. Create a webhook
Instruct Webex Teams to send notifications to a publicly available application each time your chatbot receives a message. Do this by registering the bot with WebEx Teams via a webhook by using a tool such as cURL or Postman.
When using cURL from the command line to register your URL to WebEx Teams, use your bot access token and the URL generated by ngrok to fill in the required POST request headers.
curl -X POST \
  https://webexapis.com/v1/webhooks \
  -H 'Authorization: Bearer <your_bot_access_token>' \
  -H 'Content-Type: application/json' \
  -d '{
      "name": "Webhook to ChatBot",
      "resource": "all",
      "event": "all",
      "targetUrl": "<your_ngrok_url>"
    }'
I prefer to use Postman to create and modify webhooks.
Again set it’s authentication Bearer token equal to the bot access token value and in the body set the target URL to that URL created by ngrok.
POST https://webexapis.com/v1/webhooks
Bearer token: ZjJlMGIwZmMtNGMwMy00N2VjLWFjODYtYWRmZmJmMjRjOTUxYWFmNWU4NzAtMTFj_P0A1_5c03050b-7cee-42d0-87de-4da1c3469570
Body:
{
    "name": "Webhook to chatbot",
    "resource": "all",
    "event": "all",
    "targetUrl": ""https://538c-94-126-213-85.eu.ngrok.io"
}
To modify an existing webhook, just use the PUT command in place of POST and in the URL supply it with the ID of the webhook you wish to modify:
PUT https://webexapis.com/v1/webhooks/{webhook_id}
Any changes to target URL and/or name simply make in the request body json:
{
    "name": "Webhook to chatbot",
    "resource": "all",
    "event": "all",
    "targetUrl": "https://538c-94-126-213-85.eu.ngrok.io"
}
Also in the headers tab, make sure Content-Type is set to application/json
6. Run the application
Now that the environment is set up, you can develop your application.
Refer to the WebEx Teams API documentation for the correct syntax.
For example, to see the documentation for Teams messages, expand API Reference and choose API Call in Messages section.
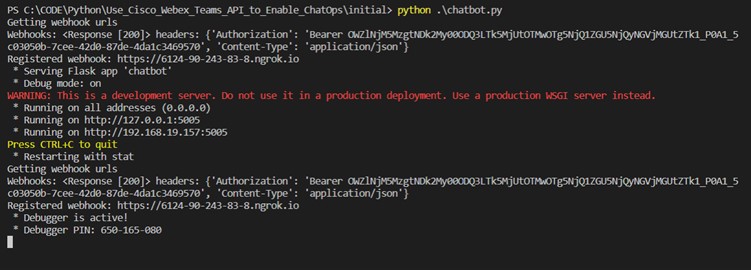
You are now ready to test your code. First, start your application by running python chatbot.py.
You may also need to do a pip install flask to run the python code, if flask has not been installed.
Start your application by running ‘python ./chatbot.py’ or run it via the debugger:
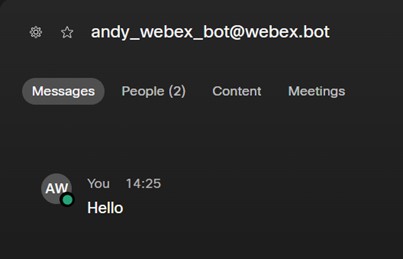
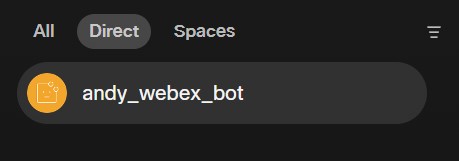
Go to the Webex Teams web client. Click on the bot you created.t
(Make sure you’ve navigated to the ‘Direct’ tab:
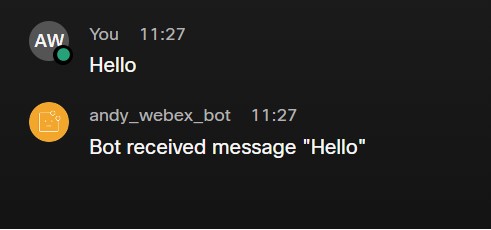
Type “Hello, bot” in the chat message. You should see that the bot has responded/acknowledged your message:
On digging further into the use of libraries to implement ngrok and other REST API commands, it is possible to automate the steps to create the tunnelling via ngrok and hence create the webhook via a few extra commands. Import pyngrok via ‘pip install pyngrok’ and use the ngrok object to open the tunnel via the ‘connect’ method and add an extra method to the Message class to do the POST command to create the webhook.
Updated code as follows:
chatbot.py
import requests
from flask import Flask, json, request
from pyngrok import ngrok

from messenger import Messenger

app = Flask(__name__)
port = 80 # got be port 80 for http
msg = Messenger()

print("Starting up the app to listen for incoming WebEx chat messages...")
# create the tunneling via ngrok
ngrok_tunnel = ngrok.connect(port=port)
ngrok_public_url  = ngrok_tunnel.public_url

# create the webhook to insteuct WebEx teams to send notifications when mesage entered in the chat
msg.create_webhook(ngrok_public_url)

# Listen for incoming http messages coming from the WebEx chat bot
@app.route('/', methods=['GET', 'POST'])
def index():
    if request.method == 'GET':
        return f'Request received on local port {port}'
    elif request.method == 'POST':
        if 'application/json' in request.headers.get('Content-Type'):
            data = request.get_json()

            if msg.bot_id == data.get('data').get('personId'):
                return 'Message from self ignored'
            else:
                print(json.dumps(data,indent=4))
                msg.room_id = data.get('data').get('roomId')
                message_id = data.get('data').get('id')
                msg.get_message(message_id)

                if msg.message_text:
                   msg.reply = f'Bot received message "{msg.message_text}"'
                   msg.post_message(msg.room_id, msg.reply)

                return data
        else:
            return ('Wrong data format', 400)

if __name__ == '__main__':
    app.run(host="0.0.0.0", port=port, debug=False)
messenger.py
import json
import requests

# API Key is obtained from the Webex Teams developers website - replace with the bot access token generated for you
api_key = 'ZjJlMGIwZmMtNGMwMy00N2VjLWFjODYtYWRmZmJmMjRjOTUxYWFmNWU4NzAtMTFj_P0A1_5c03050b-7cee-42d0-87de-4da1c3469570'
# Webex Teams messages API endpoint
base_url = 'https://webexapis.com/v1/'

class Messenger():
    def __init__(self, base_url=base_url, api_key=api_key):
        self.base_url = base_url
        self.api_key = api_key
        self.headers = {
            "Authorization": f"Bearer {api_key}",
            "Content-Type": "application/json"
        }
        self.bot_id = requests.get(f'{self.base_url}/people/me', headers=self.headers).json().get('id')

    def get_message(self, message_id):
        """ Retrieve a specific message, specified by message_id """
        received_message_url = f'{self.base_url}/messages/{message_id}'
        self.message_text = requests.get(received_message_url, headers=self.headers).json().get('text')
        print(self.message_text)


    def post_message(self, room_id, message):
        """ Post message to a Webex Teams space, specified by room_id """
        data = {
            "roomId": room_id,
            "text": message,
            }
        post_message_url = f'{self.base_url}/messages'
        post_message = requests.post(post_message_url,headers=self.headers,data=json.dumps(data))
        print(post_message)

    def create_webhook(self, target_url):
        """ Post message to a Webex Teams space, specified by the ngrok public url """
        data = {
            "name": "Webhook to ChatBot",
            "resource": "all",
            "event": "all",
            "targetUrl": target_url
        }
        create_webhook_url = f'{self.base_url}webhooks'
        webhook_request = requests.post(create_webhook_url,headers=self.headers,data=json.dumps(data))
        print(webhook_request)
On running the chatbot.py code the application can now listen and react to incoming http messages without the additional tasks needed to run ngrok and Postman to create the webhooks.