A short example of how to started with Windows programming in non-Visual Studio environments.
In this example, we use the MinGW (Minimalist GNU for Windows) compiler within the Code::Blocks integrated development environment.
MinGW can be obtained via the following link:
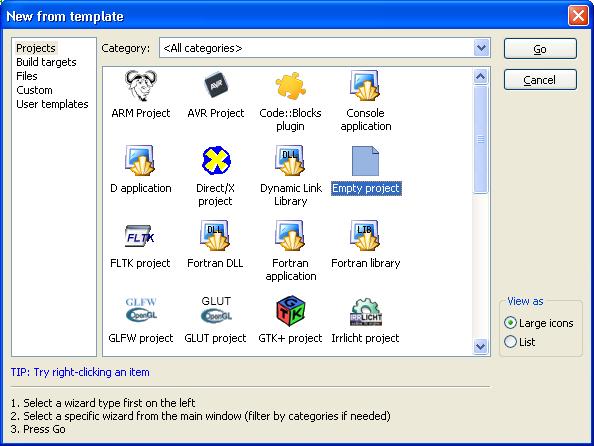
First select File > New > Project… and opt to create a new empty project:
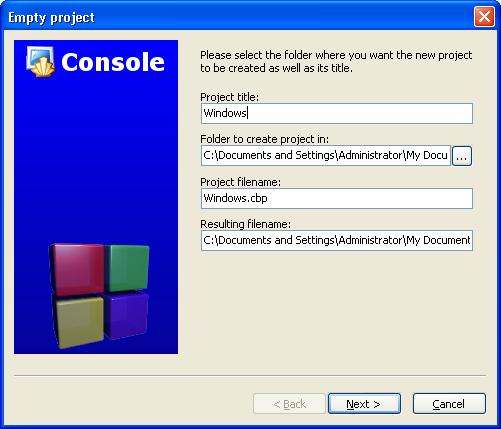
And then name and create the project:
Select the compiler
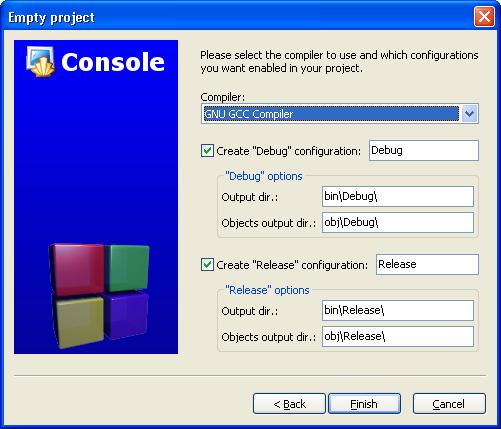
And then click Finish.
Create a new main.cpp file for the project and use the example code to exercise Windows functionality:
#include <windows.h>
#include <set>
#define WIN32_LEAN_AND_MEAN
const unsigned radius = 3;
int xPos = 0;
int yPos = 0;
typedef std::pair<int, int> coordinate;
typedef std::set<coordinate>::const_iterator coord_iter;
// Step 4: Process any message sent to the Window
LRESULT CALLBACK WndProc(HWND hwnd,
UINT message,
WPARAM wParam,
LPARAM lParam)
{
PAINTSTRUCT paintStruct;
HDC hDC;
HBRUSH hOldBrush, hNewBrush;
static std::set<coordinate> coords;
switch( message )
{
case WM_CREATE:
return 0;
break;
case WM_CLOSE:
PostQuitMessage(0);
return 0;
break;
case WM_PAINT:
// Paint the set of circles
hDC = BeginPaint( hwnd, &paintStruct );
hNewBrush = CreateSolidBrush(RGB(255, 255, 0));
hOldBrush = (HBRUSH) SelectObject(hDC, hNewBrush);
for ( coord_iter it = coords.begin();
it != coords.end();
++it )
{
const int x = (*it).first;
const int y = (*it).second;
Ellipse( hDC, x - radius, y + radius, x + radius, y - radius );
}
SelectObject(hDC, hOldBrush);
DeleteObject(hNewBrush);
EndPaint(hwnd, &paintStruct);
return 0;
break;
case WM_MOUSEMOVE:
// Store the mouse cursor position at every movement
xPos = LOWORD(lParam);
yPos = HIWORD(lParam);
break;
case WM_LBUTTONDOWN:
// Store unique set of mouse coordinates and redraw
coords.insert( std::make_pair( xPos, yPos ) );
InvalidateRect(hwnd, NULL, TRUE);
break;
default:
break;
}
return DefWindowProc( hwnd, message, wParam, lParam );
}
int APIENTRY WinMain(HINSTANCE hInstance,
HINSTANCE hPrevInstance,
LPSTR lpCmdLine,
int nCmdShow)
{
WNDCLASSEX windowClass; // window class
HWND hwnd; // window handle
MSG msg; // message
// Step 1: Create the Windows class, exit if unsuccessful
windowClass.cbSize = sizeof( WNDCLASSEX );
windowClass.style = CS_HREDRAW | CS_VREDRAW;
windowClass.lpfnWndProc = WndProc;
windowClass.cbClsExtra = 0;
windowClass.cbWndExtra = 0;
windowClass.hInstance = hInstance;
windowClass.hIcon = LoadIcon( NULL, IDI_APPLICATION );
windowClass.hCursor = LoadCursor( NULL, IDC_ARROW );
windowClass.hbrBackground = (HBRUSH) GetStockObject( WHITE_BRUSH );
windowClass.lpszMenuName = NULL;
windowClass.lpszClassName = "MyClass";
windowClass.hIconSm = LoadIcon( NULL, IDI_WINLOGO );
// Step 2: Register the window, exit if unsuccessful
if ( !RegisterClassEx(&windowClass) ) return 0;
// Step 3: Create the window, exit if unsuccessful
if ( !CreateWindowEx(
NULL, // extended style
"MyClass", // class name
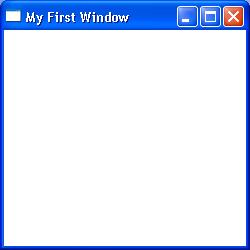
"My First Window", // app name
WS_OVERLAPPEDWINDOW | WS_VISIBLE | WS_SYSMENU, // window style
50, // x coordinate
50, // y coordinate
250, // width
250, // height
NULL, // handle to parent
NULL, // handle to menu
hInstance, // application instance
NULL ) ) return 0; // no extra parameter's
// Step 4: Enter the main message loop and event handling
while(GetMessage(&msg, NULL, 0, 0) > 0)
{
TranslateMessage(&msg);
DispatchMessage(&msg);
}
return msg.wParam;
}
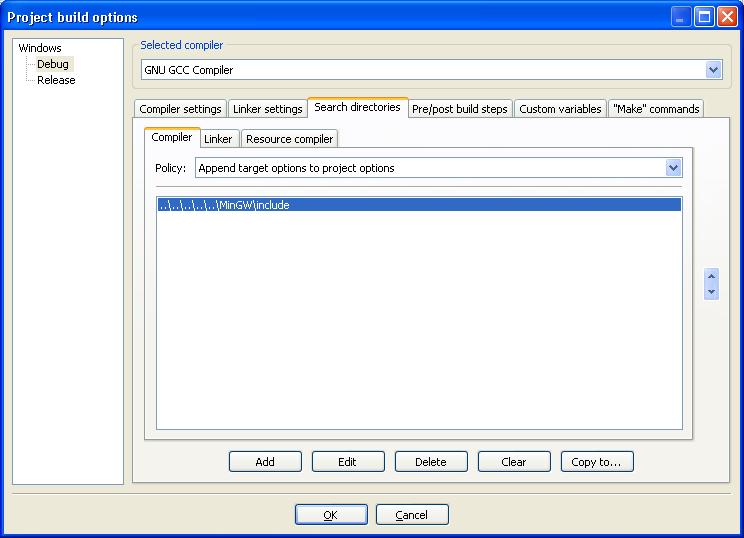
Right-click the project folder and select Build Options.
Select the Search Directories tab, followed by the Compiler tab. Click Add to set the location of the MinGW include directory:
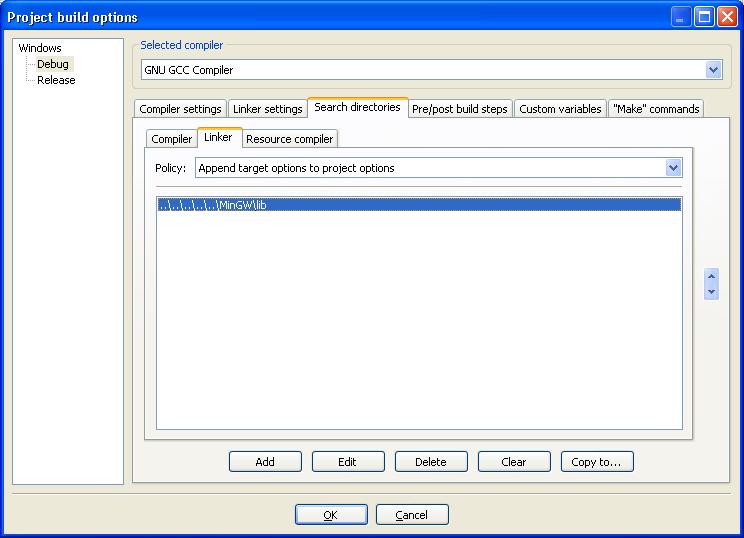
Then select the Linker tab and set the location of the MinGW libraries:
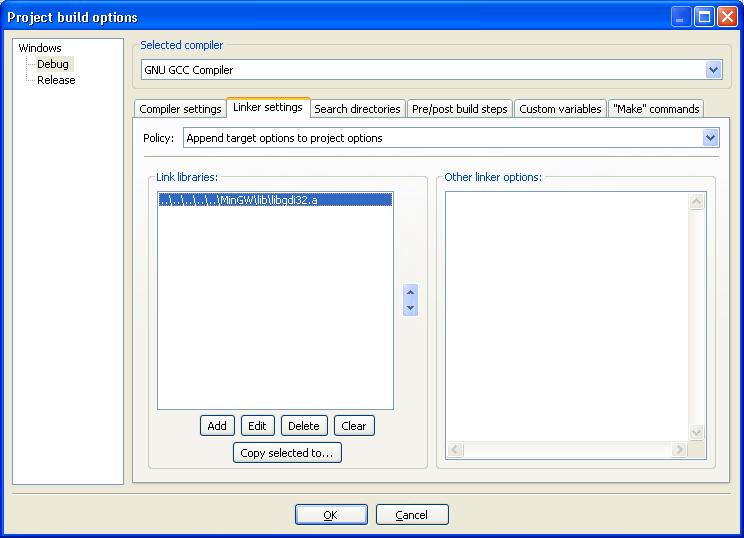
Now select the Linker Setting tab. Use this dialog set the names of the MinGW libraries we will want to use. For this simple example we will need to add the gdi32 library:
The should be the only steps necessary to enable this example to compile and run.
Now run it to generate our very first Windows example within Code::Blocks: