To create a very simple ASP.NET Web API service as an example, please see this previous post:
https://www.technical-recipes.com/2018/getting-started-with-creating-asp-net-web-api-services/
This will show you how to create a basic Web API service, with example controller, example registration, no authentication etc:
Open IIS Manager:

Right-click on Sites and select Add web site:

You are presented with the Add Web Site dialog:
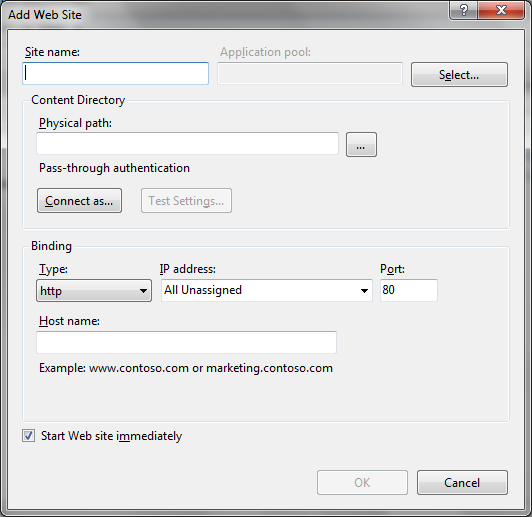
Fill in the details: give the web site a name. Navigate to your Visual Studio web api service program to set the physical path. Also choose a port number:
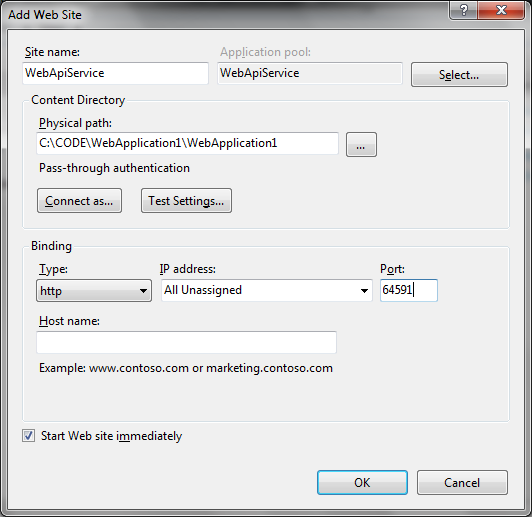
Click OK.
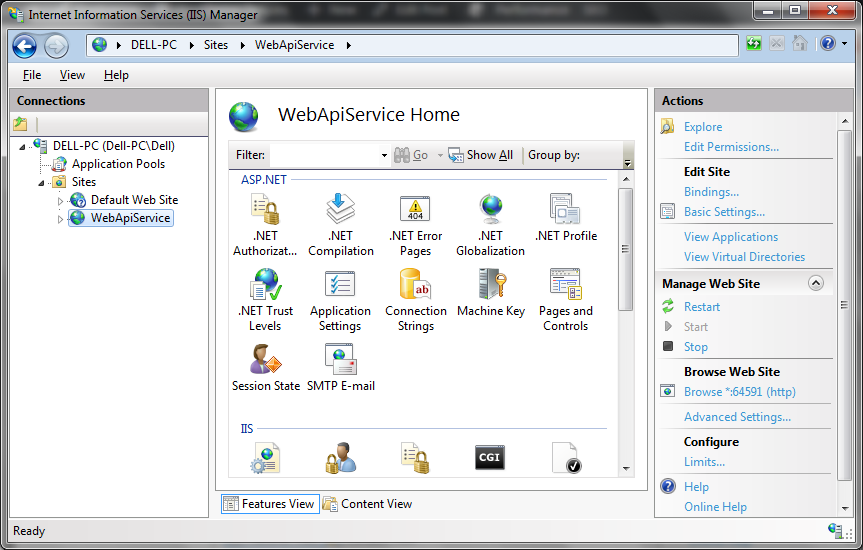
A new web site is created in IIS Manager:
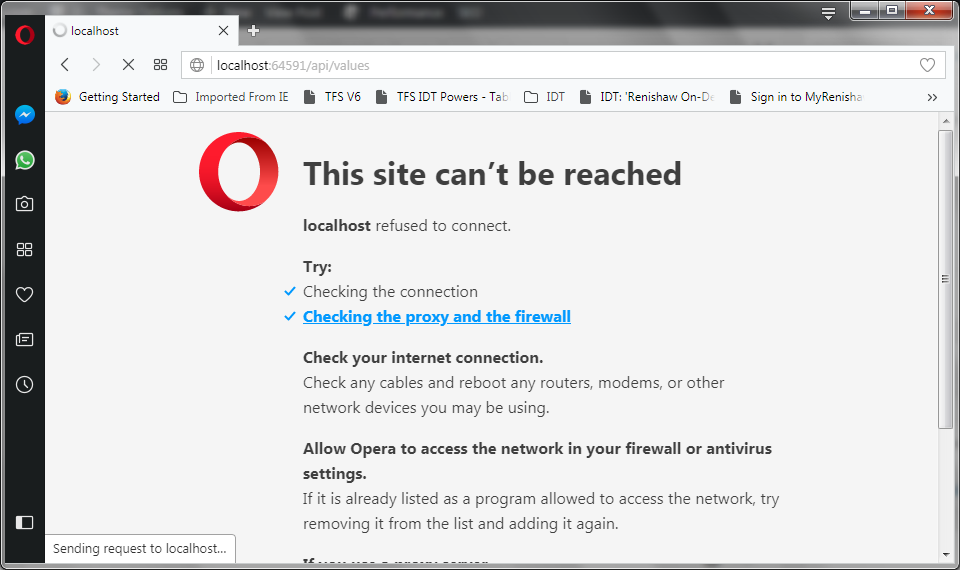
Try browsing the site:
You may get an error similar to the following, saying that the site cannot be reached:
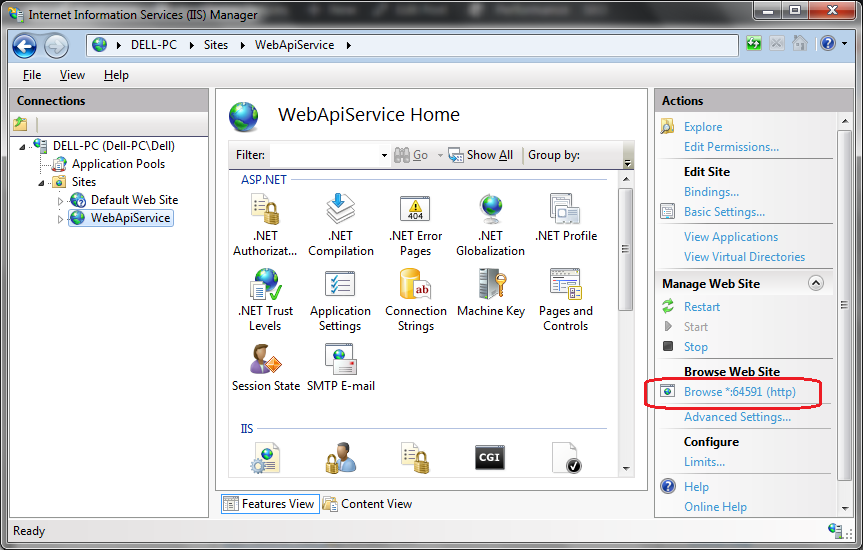
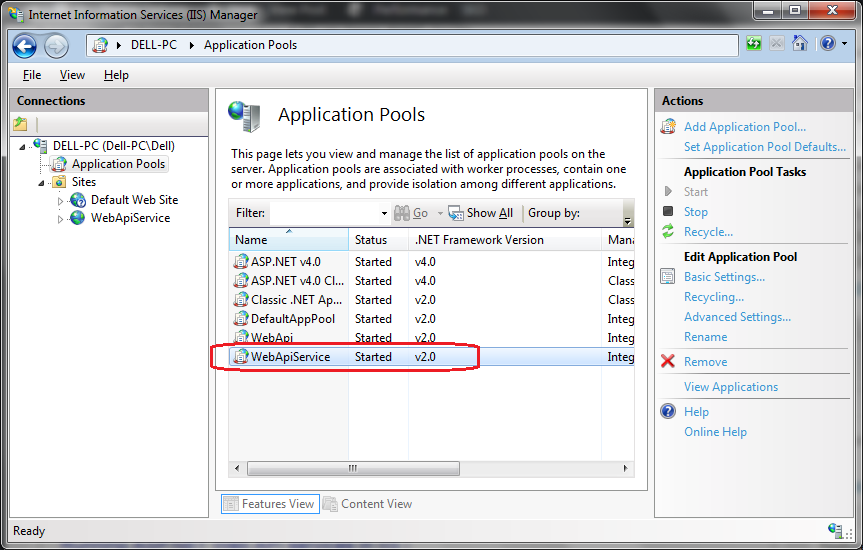
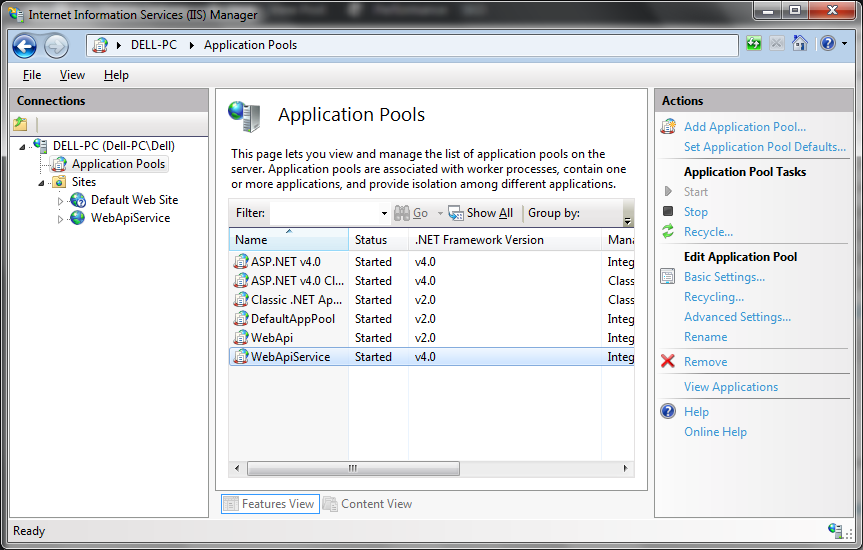
If this is the case, inspect the Application Pools in IIS, specifically the version of .NET the site is using:
The Web Api service needs .NET version 4 or above, so change this by clicking on Basic Settings:
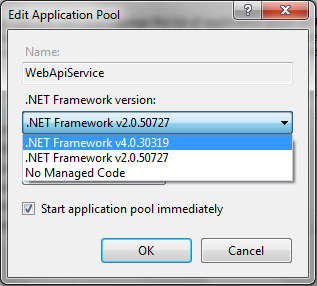
Like so:
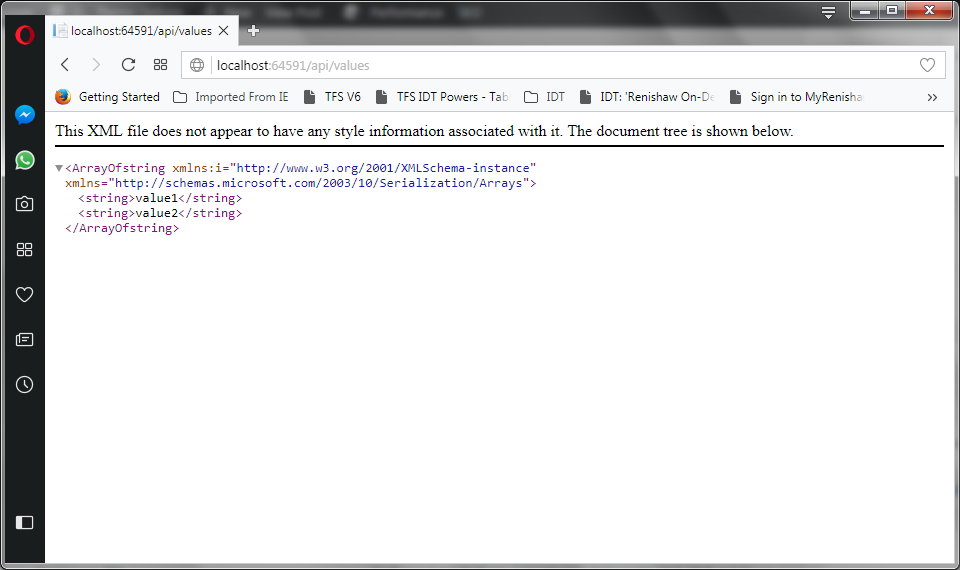
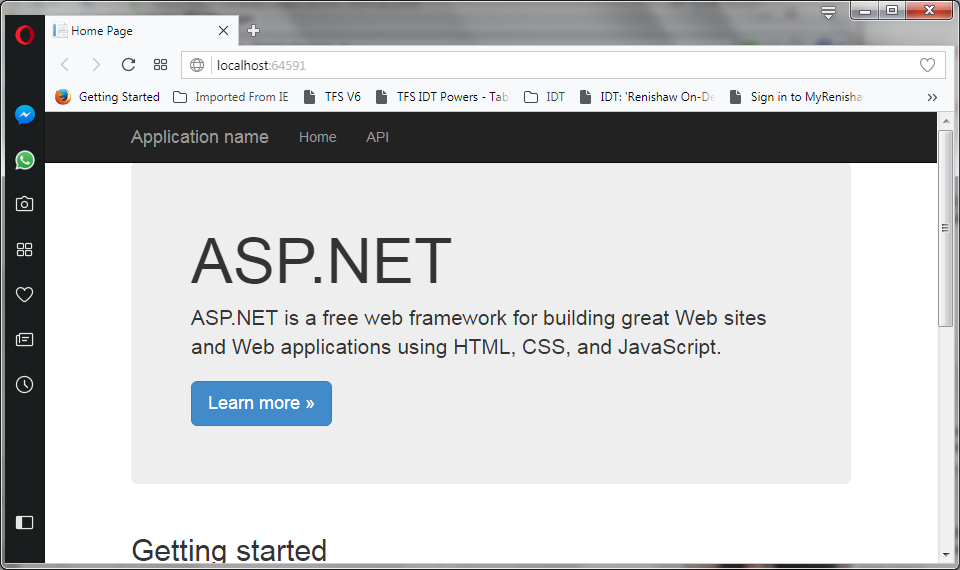
Re-start the web service in IIS and try browsing the site again notice that we see the available web service in the browser now:
We can also try and run one of the GET commands again, as define in the Values controller:
http://localhost:64951/api/values
So that we get the values returned by the service as shown: